| Please Wait Loading ..... |
 |

Quick Navigation
From this side of the screen, I can feel those anxious eyes of a coffee lover, trying to find solutions to a lot of ambiguities and solutions to their question about how to use Keurig K-15. It doesn’t matter if you’re an experienced user who has misplaced the manual and wants to learn more about the Keurig K-15 or a newcomer who needs help understanding its features. As a coffee enthusiast, I hold all coffee lovers dear because we share a common love for coffee.
So, Stop your rambling search on the internet and consider this article as the encyclopedia on Keurig K-15. Let’s start!
It’s great that you’re eager to try out your new Keurig K-15 at home and experience its unique features. However, I want to emphasize the need to take safety precautions before using it. While having a machine that can create delicious coffee with just one click can be incredibly convenient, it’s important to remember that it can pose a potential safety hazard if not used properly. To prevent accidents, you must familiarise yourself with the safety precautions before using them. Click on the link and arm yourself with helpful information.
Now it’s time to dive into the specifications and details of your favorite Keurig K-15. Below is the overview of all the functions Keurig K15 entails. If the specifications do not meet your demands and needs, contact the retailer and return your Keurig K -15, as the money should not be invested in things not covering your needs.
| Specifications | Details |
| Product Line/System | Keurig 1.0 Classic |
| K-Cup Compatibility | Unlicensed K-Cups, Keurig 2.0 licensed K-Cups, and ground Coffee with the My K-Cup |
| Brew Sizes | 6 oz, 8 oz, 10 oz |
| Water Reservoir | 10 oz |
| Water Filter | None |
| Display | Buttons for Brew and Power; LED indicator for Add Water and Lift Handle |
| Temperature Control | No |
| Strength Control | No |
| Dimensions | Width: 6.9″Depth: 10.7″ Height: 10.8″ |
| Weight | 1.0 lb |
| Other Features | Removable drip tray, Auto-off after 90 seconds |
I know you are thrilled with the excitement of unboxing your Keurig K-15, but where unpacking a purchase is exciting, it’s also vital to ensure that everything is included in the box. Upon opening your Keurig K-15, check for the following items. Contact the seller to resolve your issue if anything needs to be added.

Upon unboxing, you will find the most awaited thing, your Keurig K-15 Coffee machine. You will find different controls and buttons on the coffee machine, including a water reservoir and its lid.

A manual is a written document containing instructions, recommendations, and other information regarding a product or service. It is frequently used to assist users or customers in understanding how to operate or maintain a product, and it may be a valuable resource for troubleshooting and problem-solving.
Warning: Please don’t remove the bottom cover of our Keurig appliance to reduce the risk of fire or an electric shock.
Before delving into the instructions for using your Keurig K-15, it’s important to familiarise yourself with the various components of the machine. Understanding the different parts of the Keurig K-15 will make it much easier to follow the brewing process and operate the machine correctly. Let’s have a look at these parts!

The Keurig k-15 coffee maker has a small water reservoir that can hold 10-ounce water.
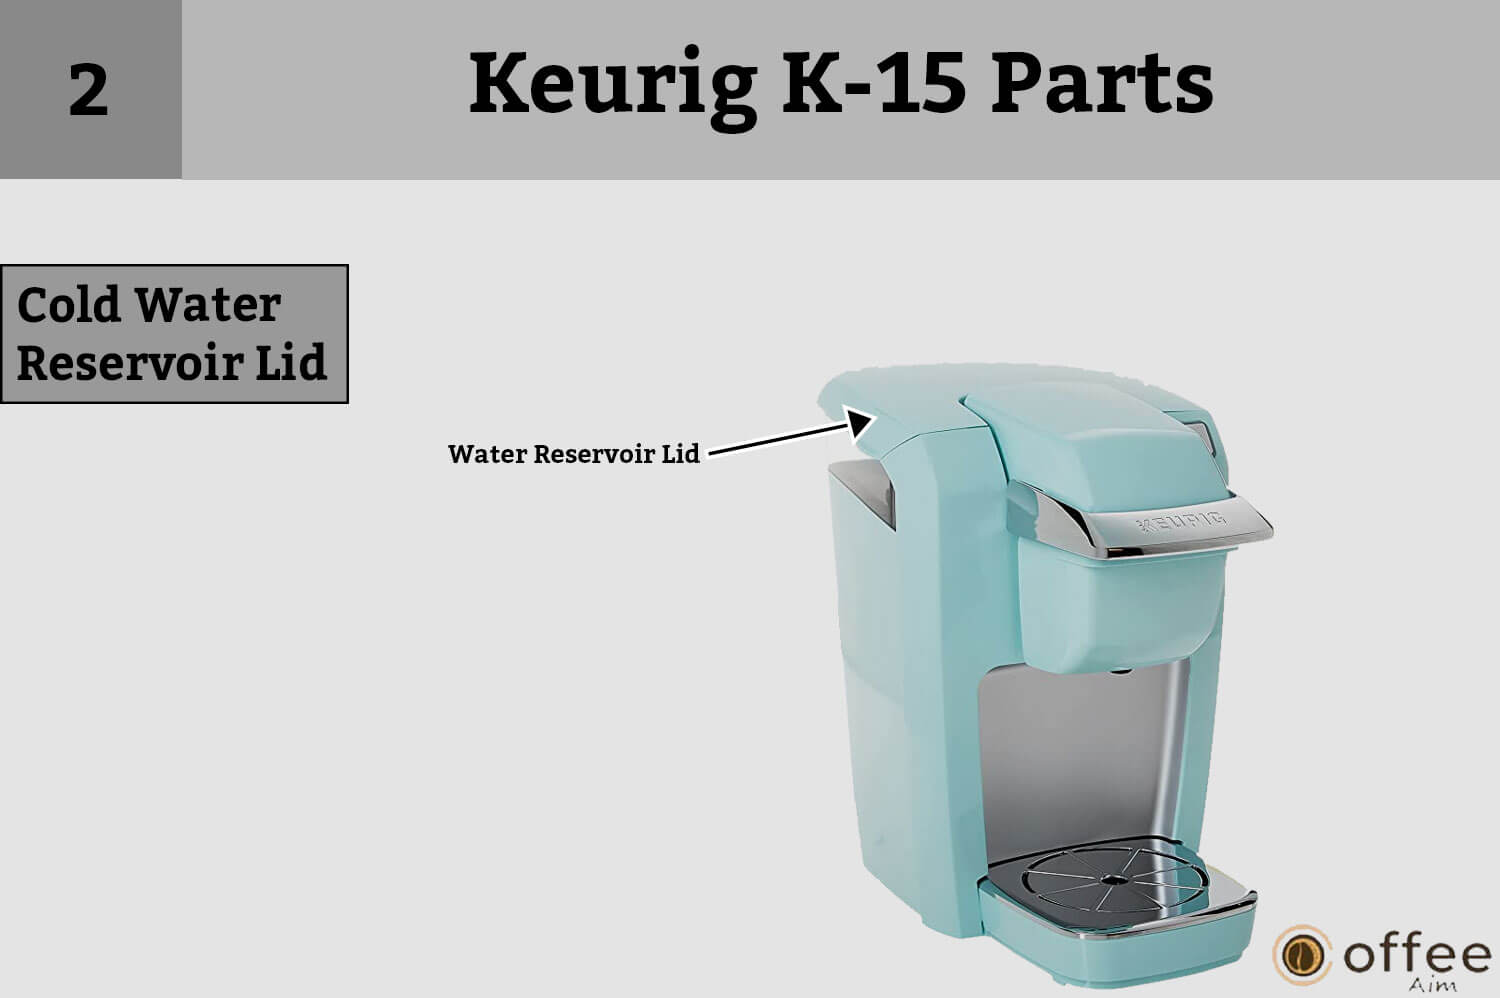
The Cold Water Reservoir Lid covers the Cold Water Reservoir and provides access to filling it with water.
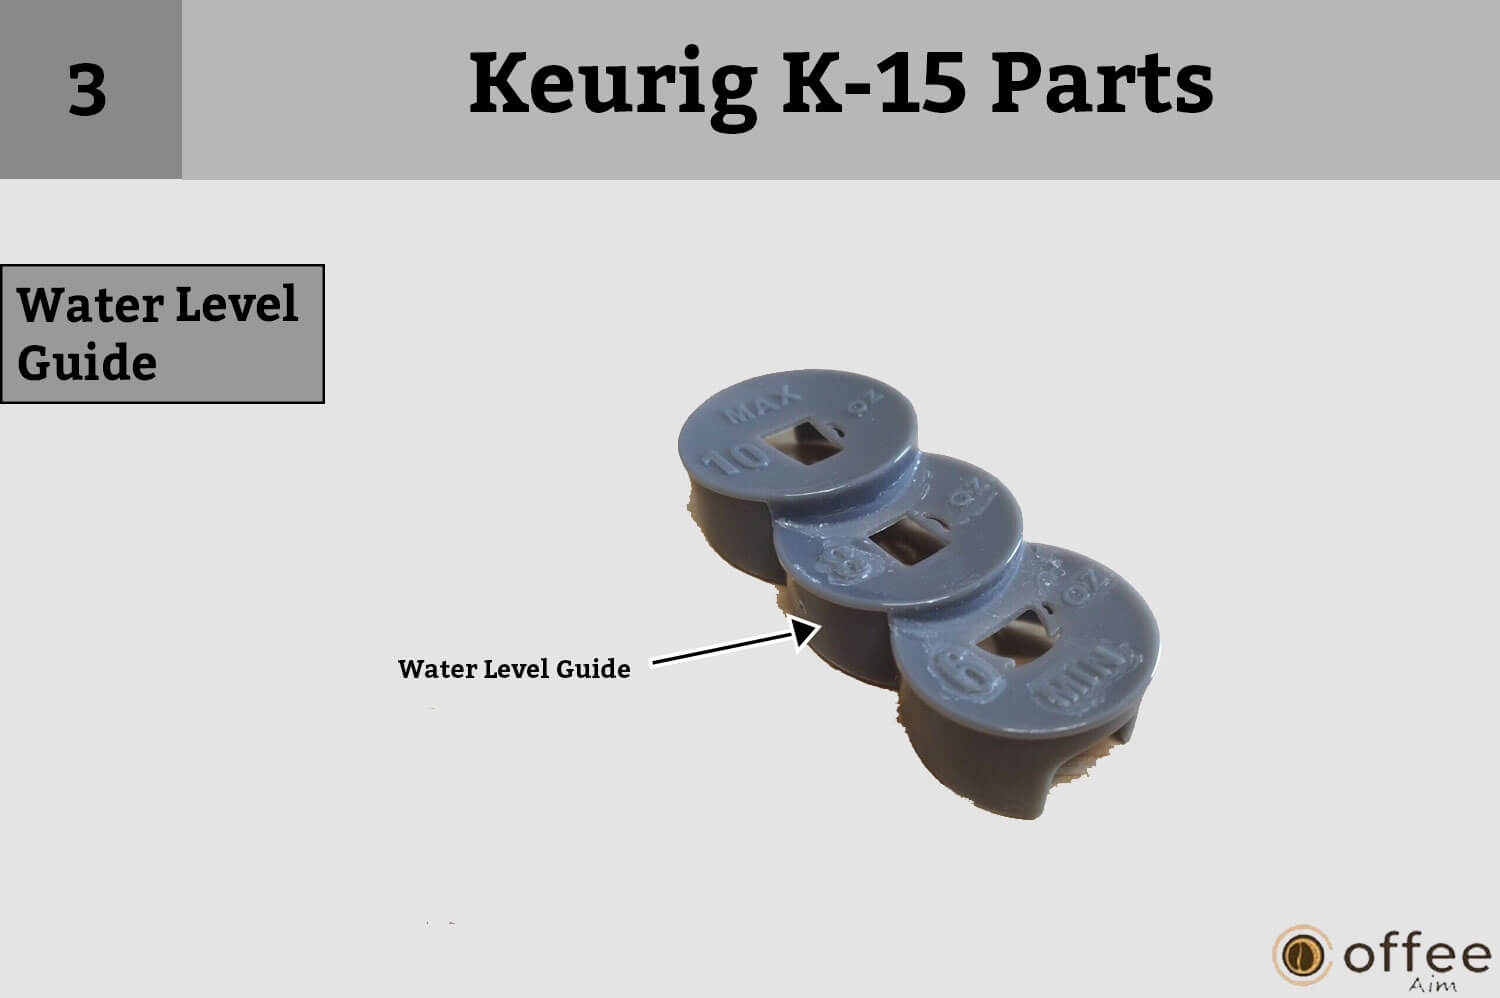
The Keurig K-15 has three plastic circles in its water tank, corresponding to 6, 8, and 10 ounces of water. These circles work as a mark, and you can fill the water according to the brew size. Due to the small reservoir, you must refill it with water after every brew to brew a coffee.
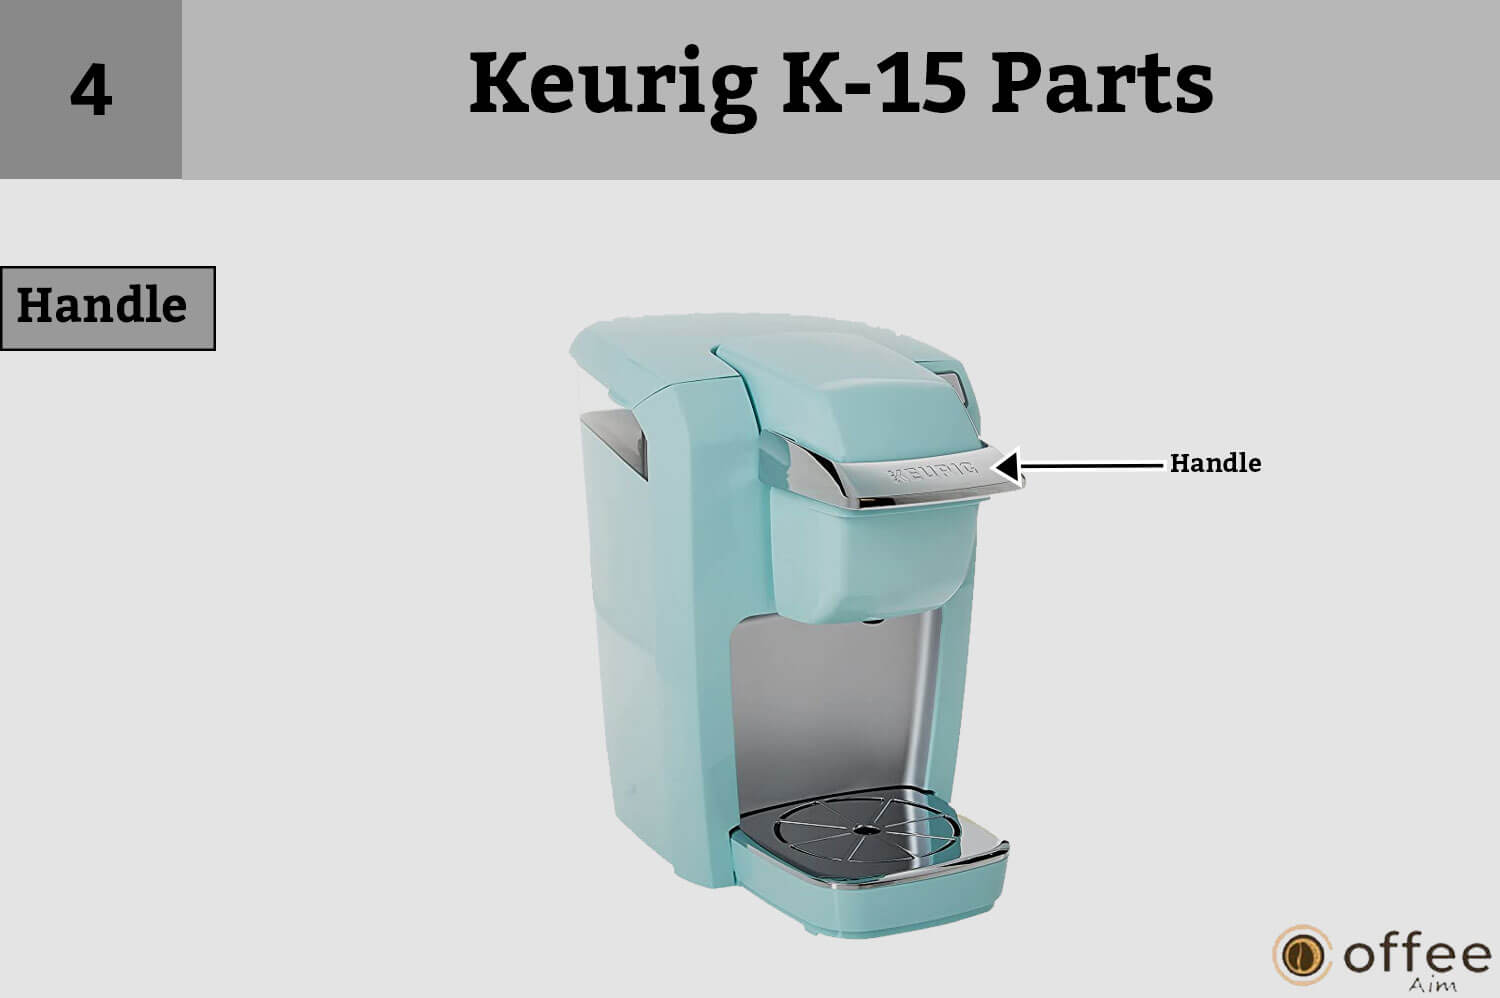
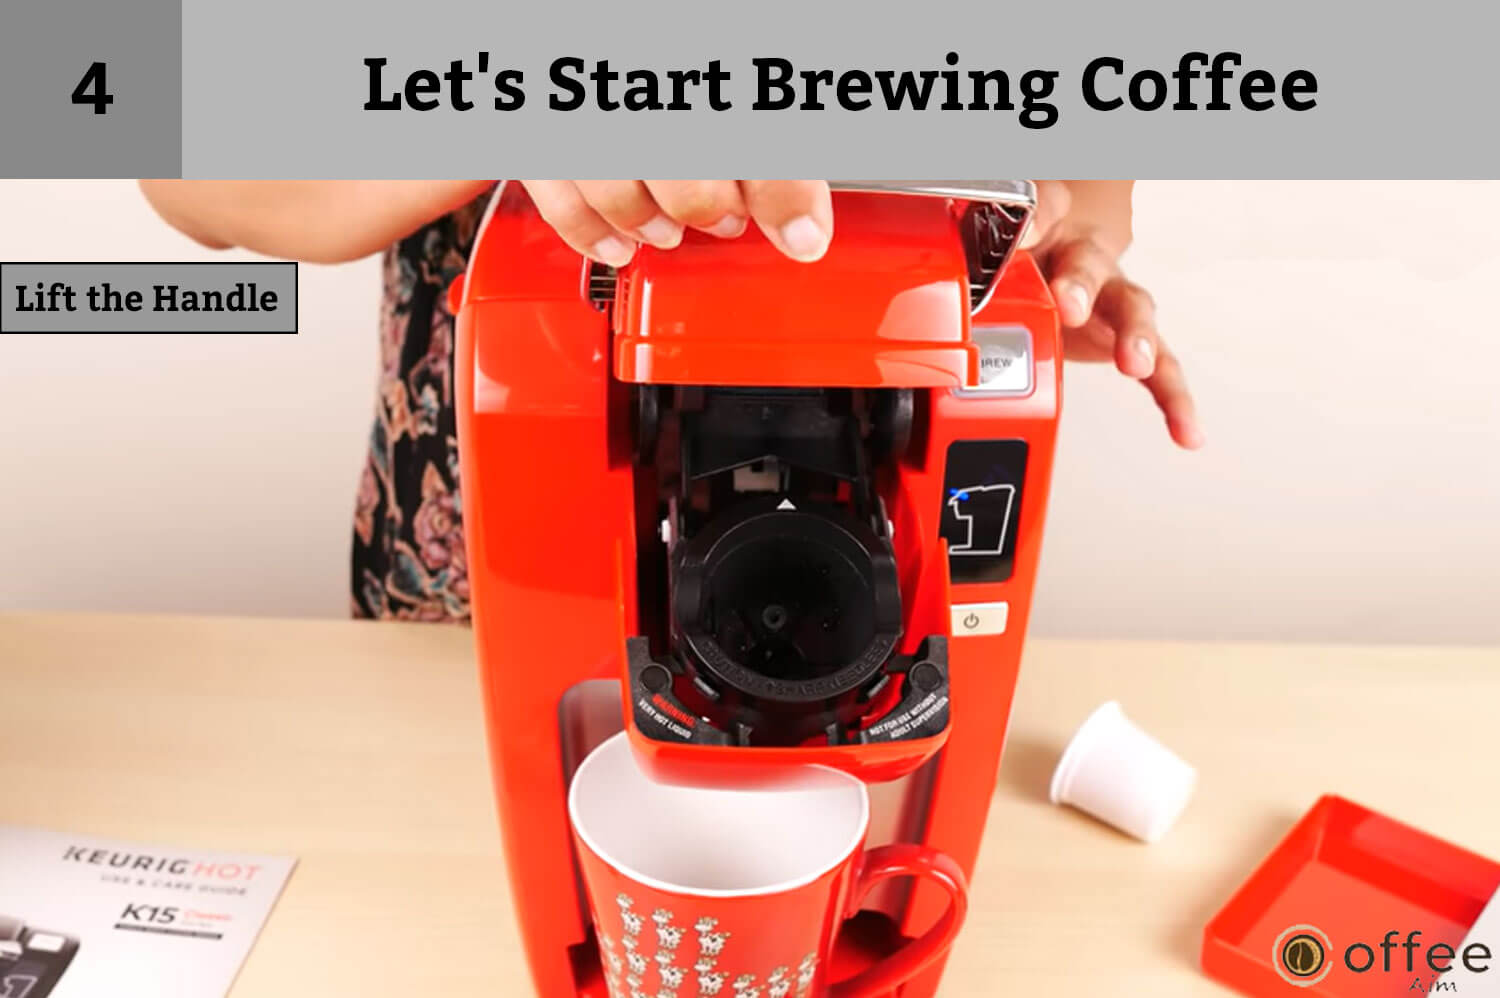
In Keurig K-15, there is a handle that is lifted up or down quickly to reach the K-cup pods inside the K-cup holder.
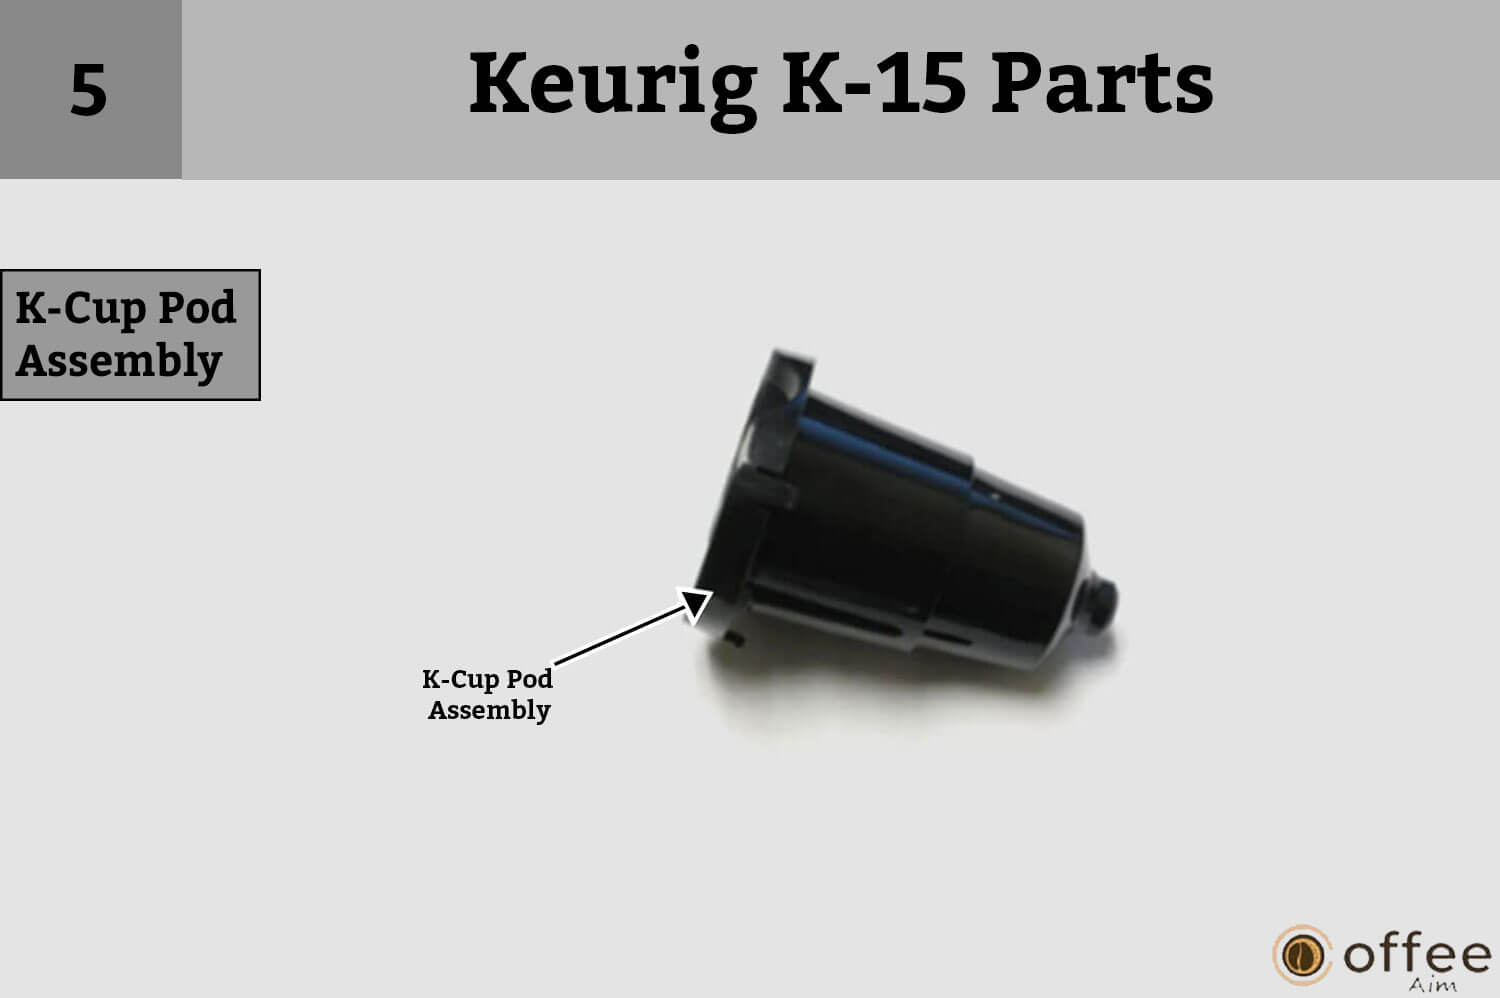
The Keurig K-15 K-Cup pod assembly has two needles. On top and one on the bottom, when you place the k-cup pod into the K-cup holder and close the lid or a handle, it will puncture it from the two sides.

The Funnel is a coffee maker component that directs water and coffee grinds into the K-Cup portion pack. It is easy to remove and wash.

The K-Cup Holder, is part of the coffee maker that holds the K-Cup portion pack.

The Drip Tray of your Keurig K-15, is a detachable component beneath the Drip Tray plate. It prevents the coffee from spilling on the shelf. Emptying the Drip Tray is essential to prevent it from overflowing.
This is a safety feature on your Keurig K-15 that warns the user when the Drip Tray is almost full.

The Drip Tray Plate is located beneath the Drip Tray and serves to collect any excess liquid that may overflow from the Drip Tray.

You can find The power cord at the back of Keurig, which provides electrical power to operate the device. It connects the device to an electrical outlet and enables it to run.

The power button of your Keurig K-15 is used to turn the brewer on and off.
Keurig K-15 has a control panel comprising various buttons and an indicator. Do you want to grasp the information on every feature and indicator of Keurig K15, check the details below.
If your Keurig K-15 LED indicator flashes a blue light, add a desired level( 6,8, or 10 ounces) of water in the reservoir and ensure the handle is down.
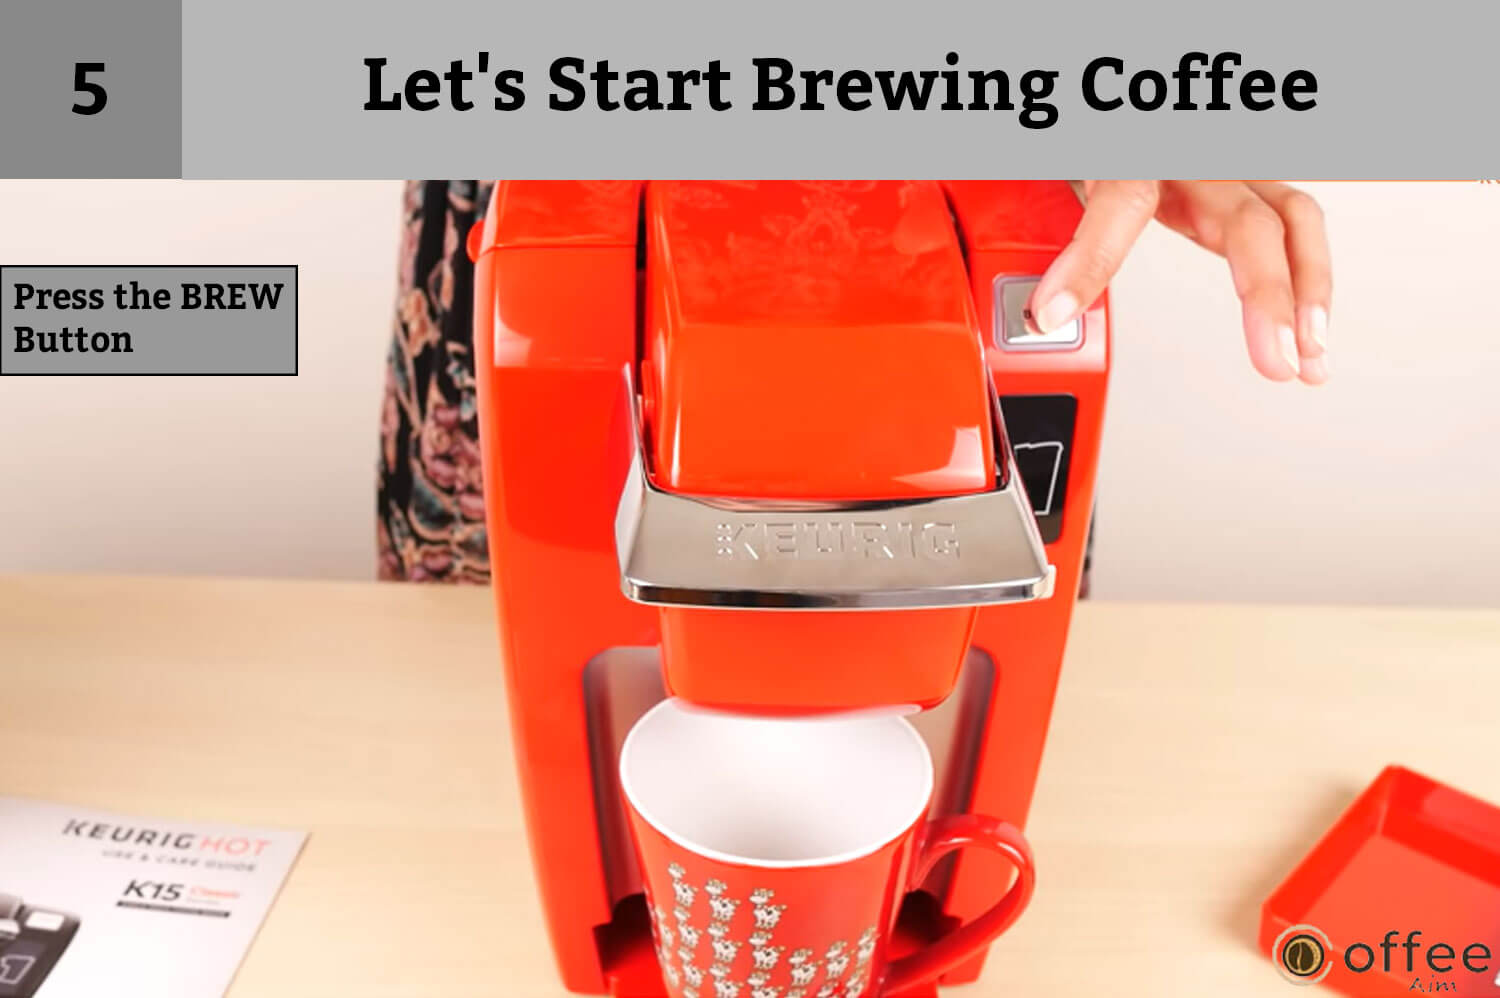
The Keurig K-15 features a Brew button to start brewing. This button is located on the front of the machine, making it easily accessible and straightforward to use. Furthermore, It also gives different indications by flashing lights. Let’s delve into the details of the lights!
It indicates that your coffee maker is ready to brew. Press the brew button.
shows that the water in the reservoir is heating up. It will take time approximately 2 minutes to heat up and start brewing.
This solid light in your Keurig k-15 indicates the dispensing of water or coffee has begun.
The power button is used to turn your brewer on and off.
The flashing blue light on your Keurig indicates that the Cold Water Reservoir needs to be filled with cold water. To do so, pour cold water into the reservoir until it reaches just under the desired water level – either 6, 8, or 10 oz., as indicated by the Water Level Guide on your device. This will ensure the proper functioning and optimal brewing results.
The Cold Water Reservoir has a minimum water level of 6 oz. When this amount is poured into the reservoir, the blue light will start flashing. You can add up to a maximum of 10 oz. of water and then close the Cold Water Reservoir Lid. The blue light will continue to flash until you lift the Handle.
If the Drip Tray in your device becomes almost full, a red float will appear as a warning indicator. Remove the drip tray and empty the content in the sink.
Your Keuring K-15, has amazing features that add ease to your life. Let’s delve deep into these features!
Once the brewing process is complete, the Add Water Indicator light will illuminate your device. At this point, you have the option to start making the next beverage, or you can power off the device.
As a safety feature, your device is designed to shut off automatically after 90 seconds of idle time. If this occurs, simply press the Power Button to restart the device. If the device shuts off while the BREW Button is flashing blue, it may indicate that there is an issue with the brewing process. In this case, you can try lifting and lowering the Handle to reset the device. This should clear any blockages or issues with the brewing process and allow you to continue making your beverage.
Before using your Keurig K-15 for the first time, performing an initial cleansing and brewing cycle is essential. It helps ensure that your coffee tastes great and your machine functions correctly. The initial cleansing process involves flushing out any dust, residue, or manufacturing oils that may be present in the machine from the production process. Once the machine is clean, the first brew cycle allows you to become familiar with its brewing process and helps ensure that it is ready for regular use. Let’s see all the steps in detail!
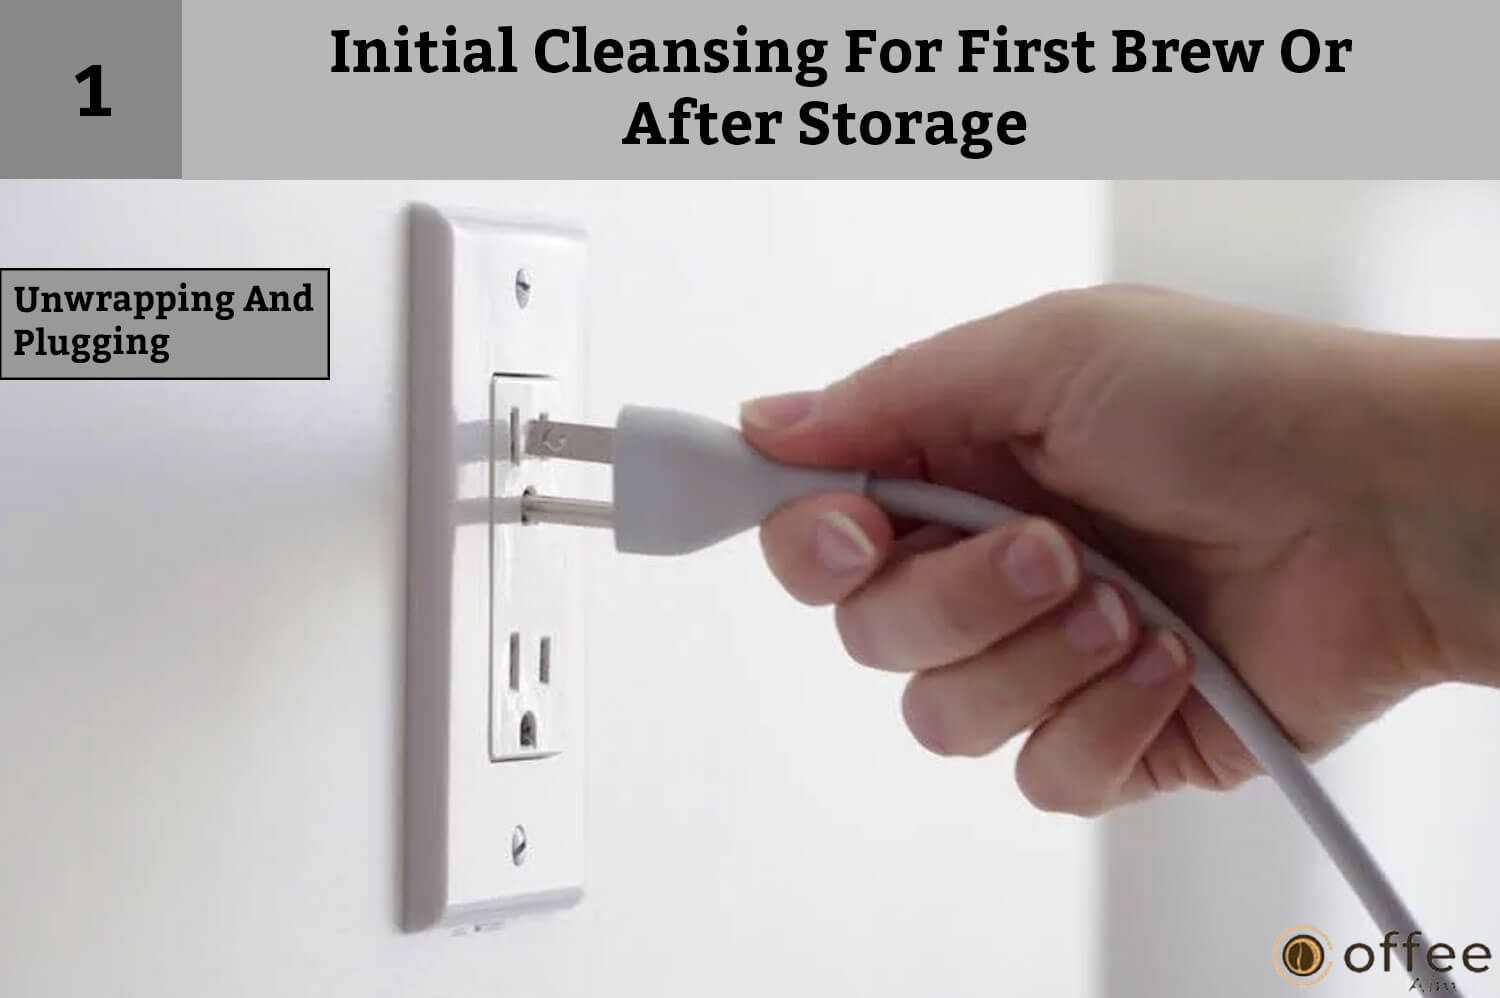
Take off all of the tape and cardboard. Connect the Power Cord to a separate, grounded outlet. Before creating your first beverage, make a cleaning brew.
Note: Don’t place a k-cup pod during the cleaning process.

After plugging the cord into the main outlet, press the power button. If the “add water” indicator flashes blue, fill the cold reservoir first. The power button light will not illuminate.

Pour water into the Cold Water Reservoir until it reaches the rim of the Water Level Guide’s chosen fill level (minimum of 6 oz.). Close the lid. Ensure you do not fill if the Handle is up for precise gauging. Bottled or filtered water is preferred over distilled or reverse osmosis water.

Lift the Handle. The water in the Cold Water Reservoir begins to drain into the brewer. Excess water flows into the Drip Tray if you add more than ten oz.
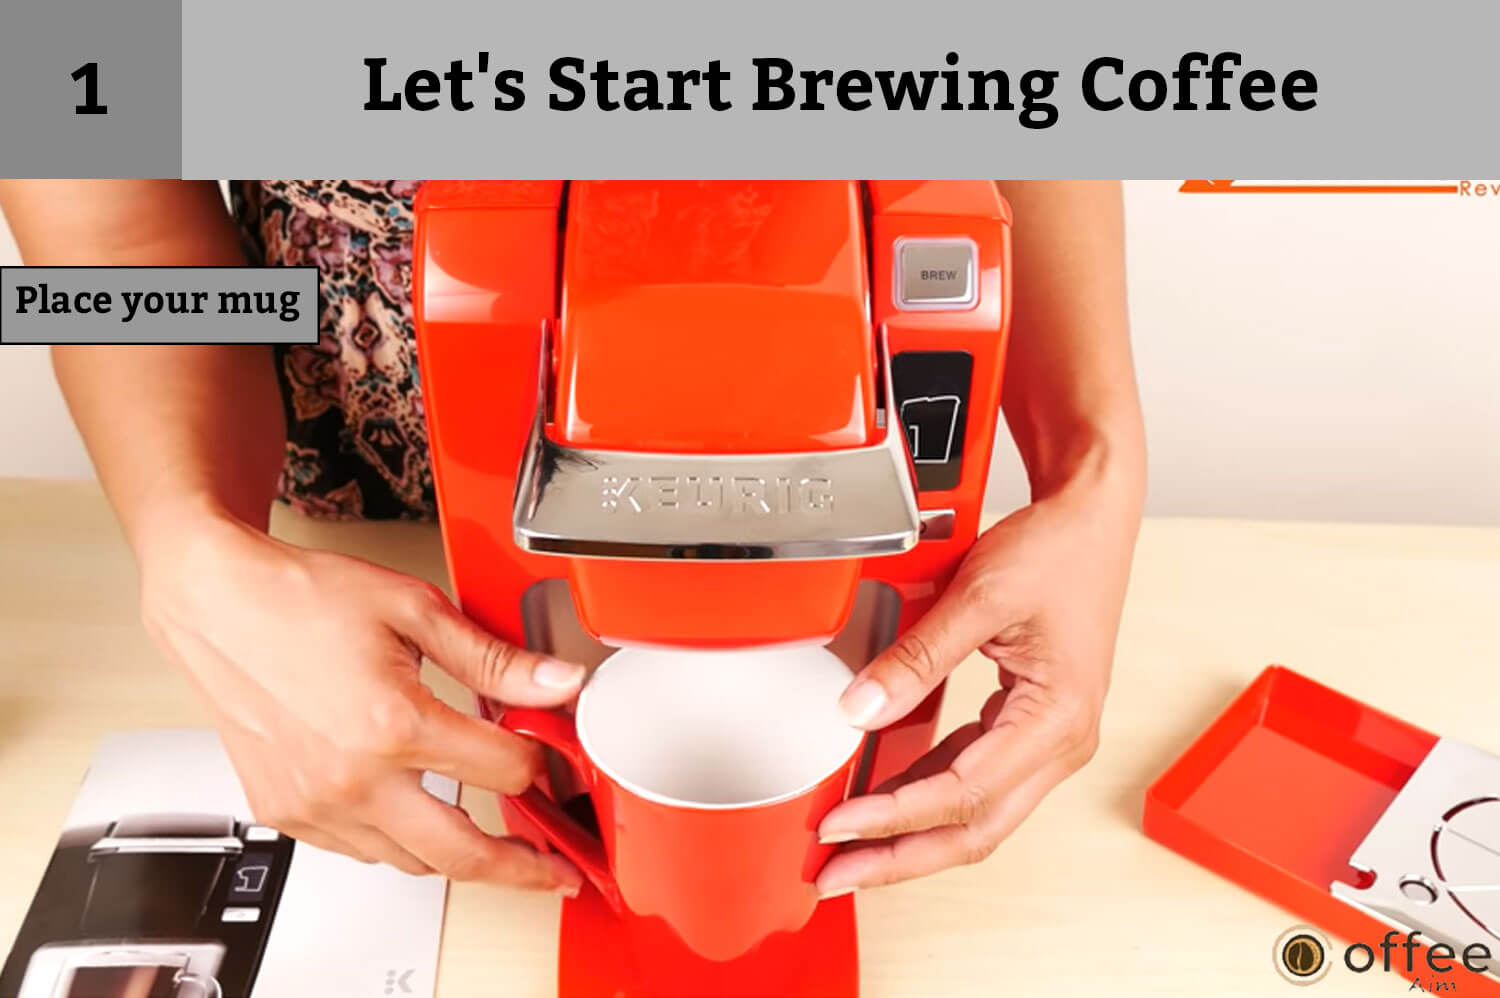
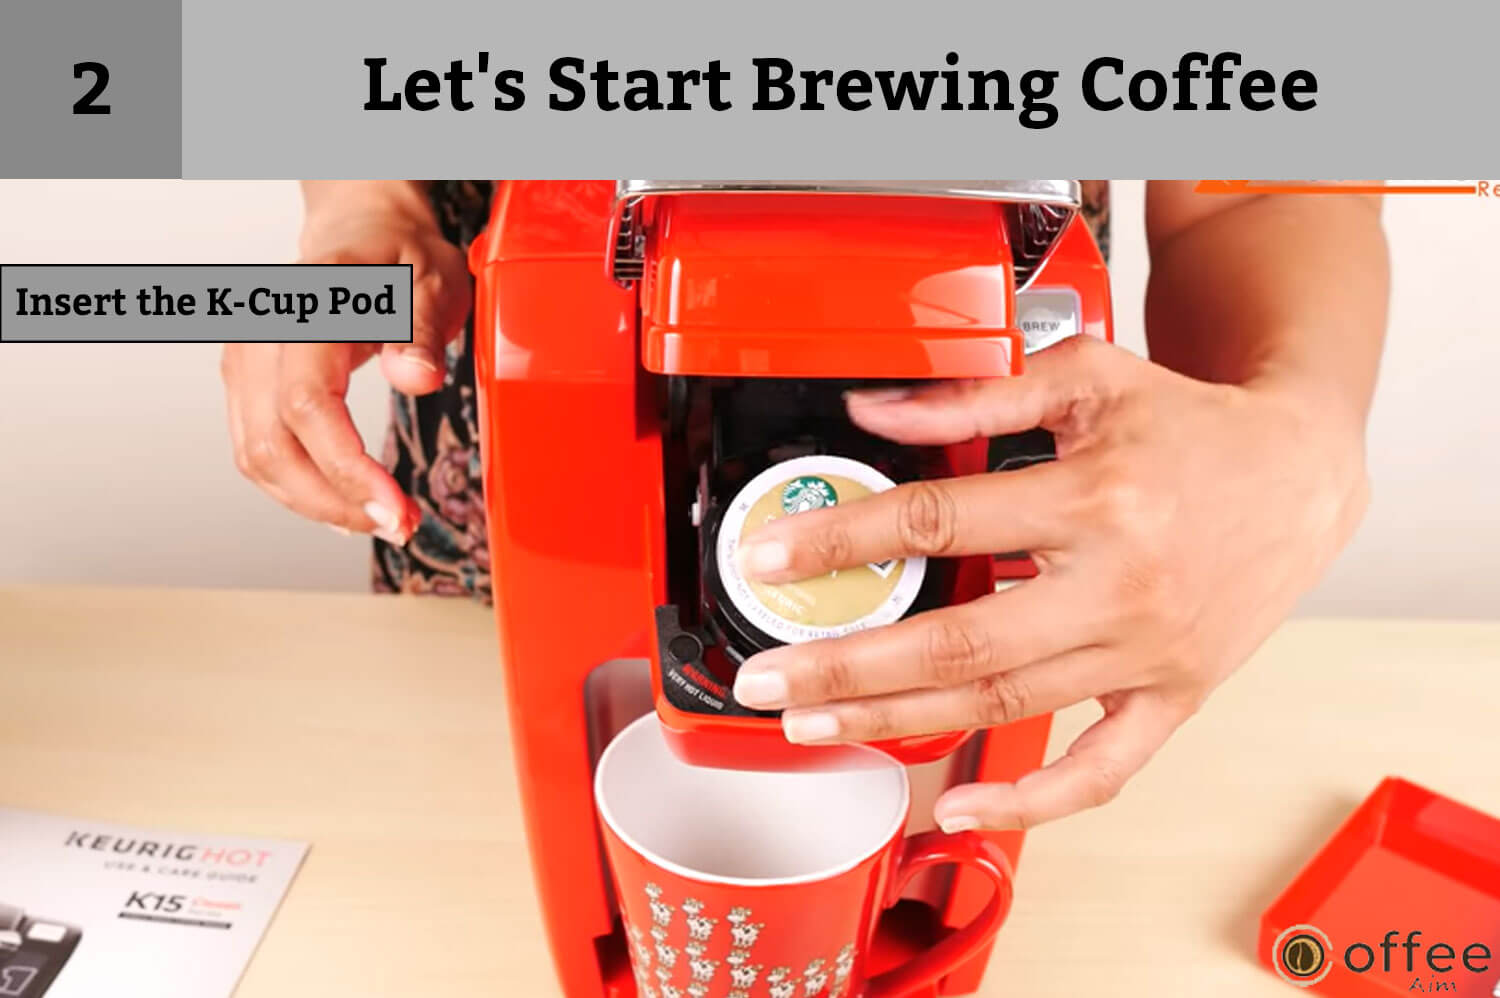
Are you ready to make your first cup of coffee with the Keurig K-15? Let us get started right now. To make a good cup of coffee, follow the directions in the order listed.
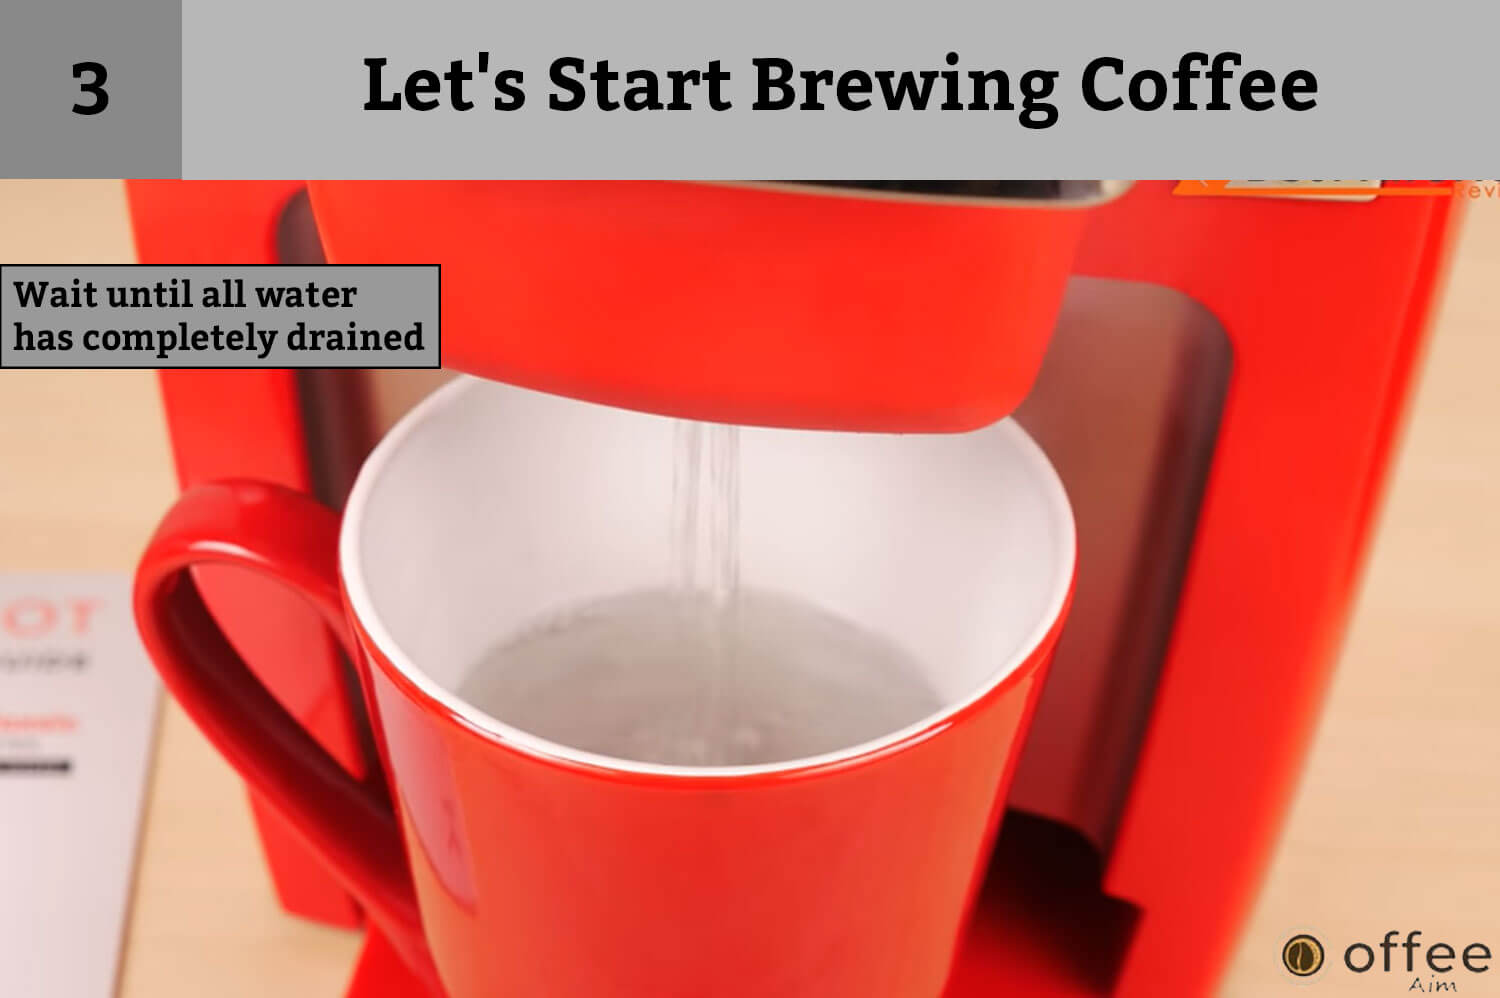
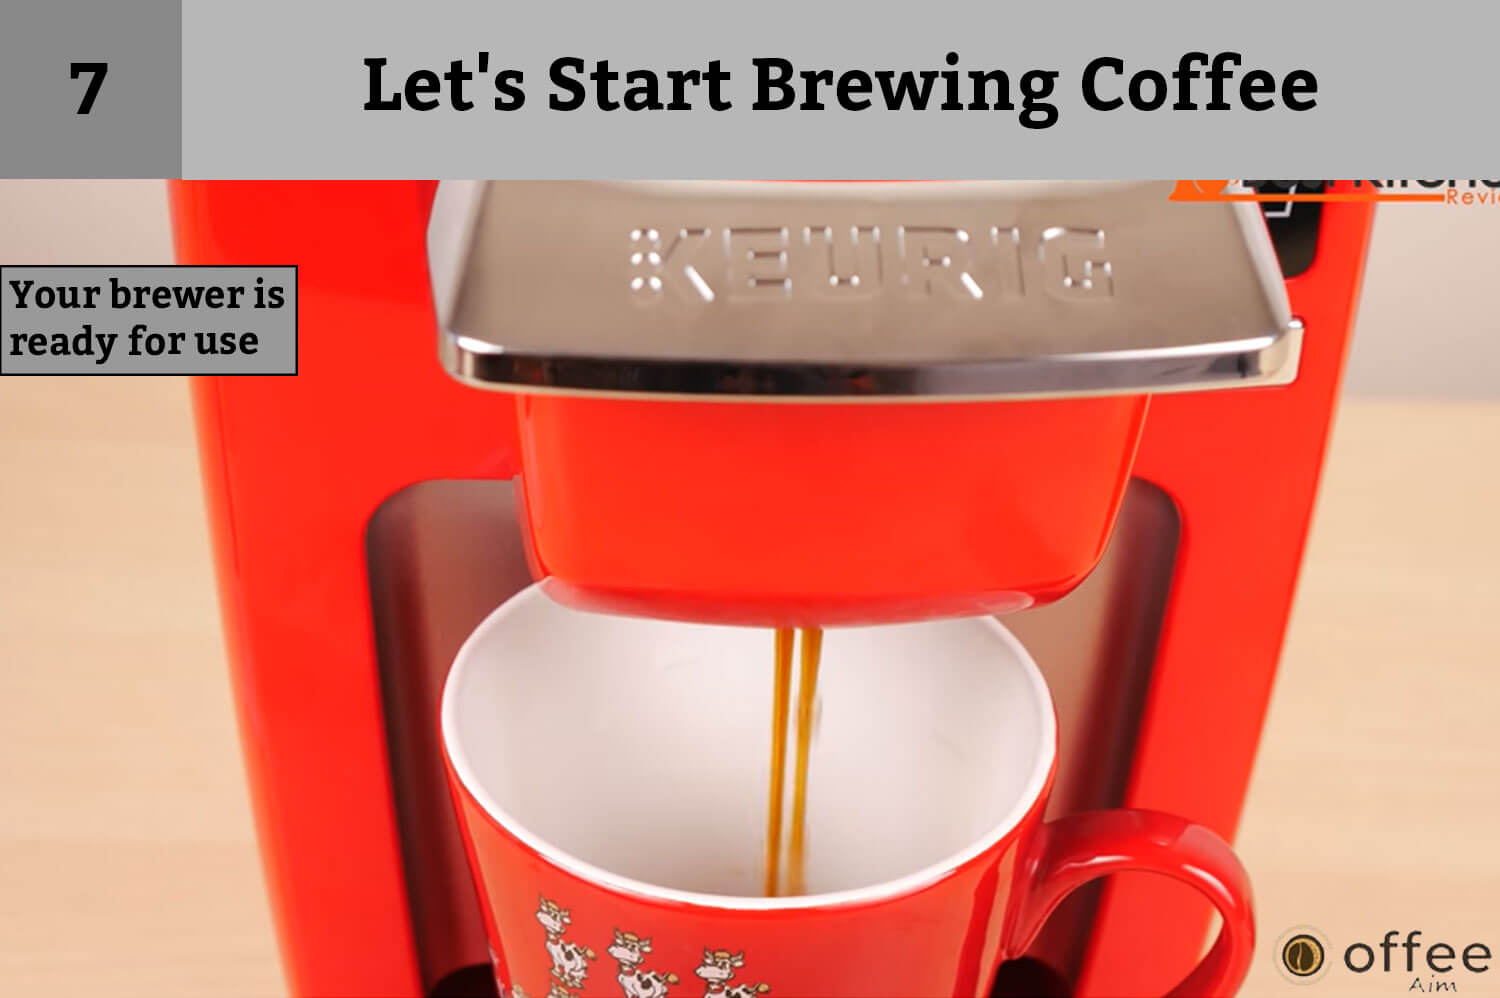
INFORMATION: As a safety measure, the brewer automatically shuts off after 90 seconds. If you are finished with the initial cleaning brew, pour the hot water into the sink. Your brewer is now ready for usage.
Note:
I know, guys, you all are eager to learn how to clean your Keurig K-15 after making a cup of coffee, so here I am giving you the most appropriate and easy way to clean it. Because every electrical instrument wants maintenance and cleaning daily, you should clean Keurig K-15 daily.
Let’s start!
Note: I recommend cleaning the Brewer external housing, Drip Tray, and Drip Tray Plate regularly.
Important: Make sure to unplug the brewer before cleaning.

Cleans the outer part of the brewer with a non-abrasive, lint-free cloth. And never immerse the brewer in water or any other liquid.
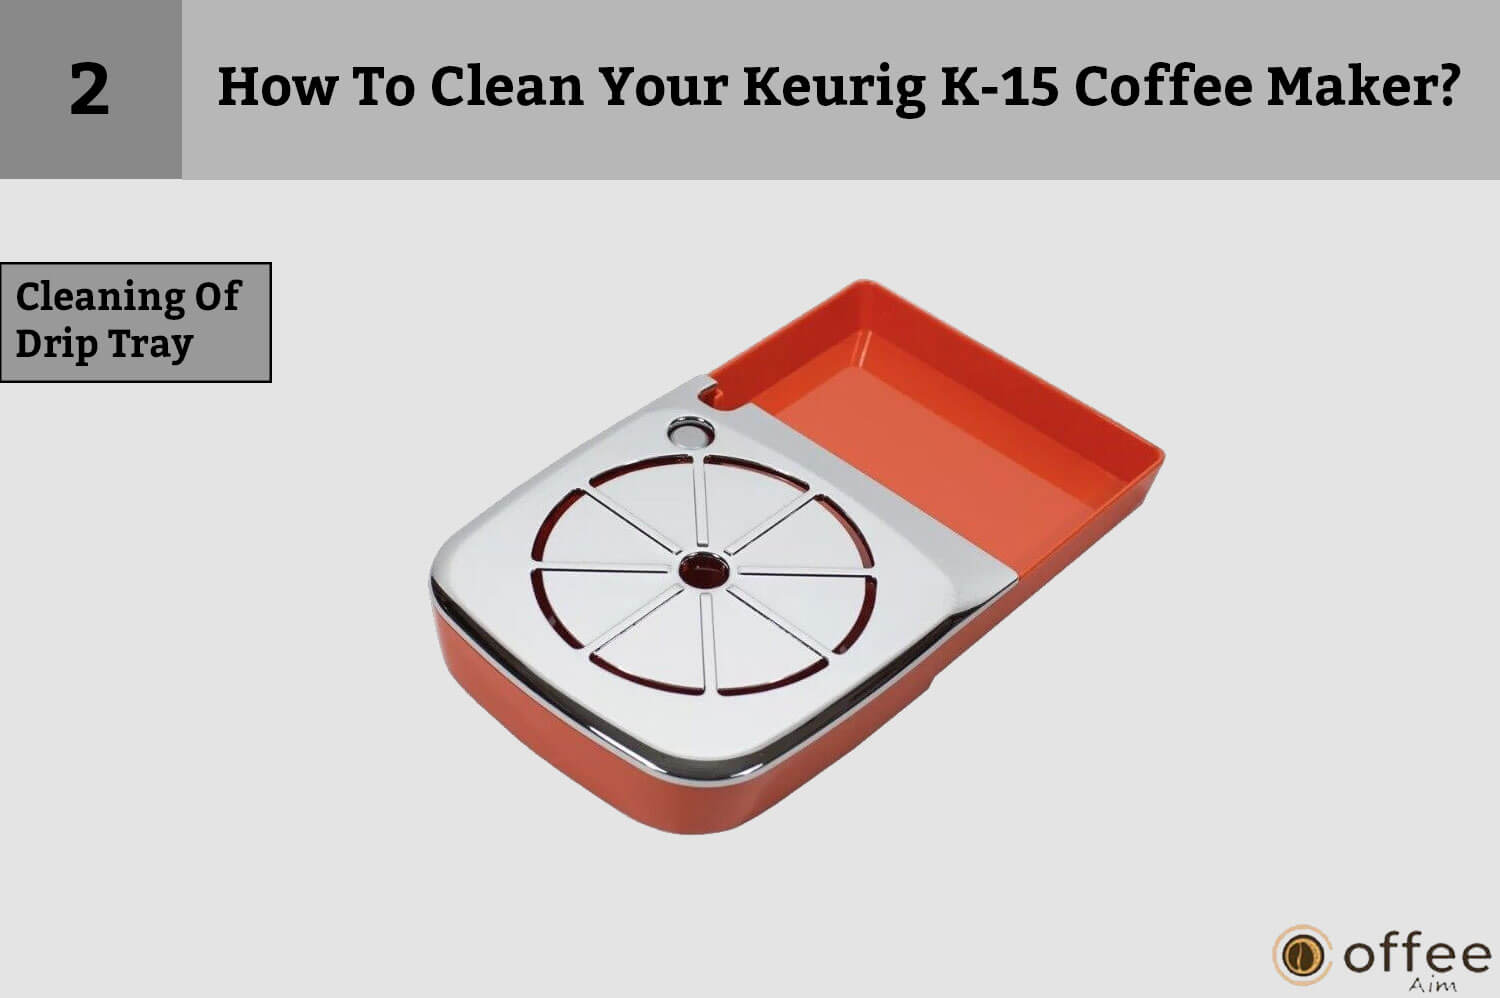
The DripTray is almost complete when the red Drip Tray Overfill signal shows. Remove with caution by moving the tray towards you. Pour the liquid into the sink. Periodically inspect and clean the Drip Tray with a moist, non-abrasive, lint-free cloth.
Note: Do not put the Drip Tray or Drip Tray Plate in the dishwasher.
Over time, the reservoir tank’s discoloration and staining appear. The buildup of minerals in water can affect the taste of your brew and lead to mineral buildup. To maintain optimal taste, make sure to clean the water reservoir regularly. Follow the steps To access the water reservoir.
It’s essential to keep your Keurig K-15 clean to ensure it continues functioning properly and producing high-quality coffee. Regular cleaning is crucial to prevent the buildup of coffee residue, mineral deposits, and bacteria that can affect the taste of your coffee and the machine’s longevity. In this way, keeping the Keurig K-15 clean is essential for maintaining optimal coffee quality and preserving the life of your coffee maker.
Cleaning of K-Cup Pod Holder Assembly parts include
• Funnel
• K-Cup Pod Holder with Exit Needle
Important: Ensure the brewer is unplugged before cleaning.
The k-cup pod holder assembly parts are dishwasher safe. However, put it on the upper shelf of the dishwasher and run a low-temperature cycle.

Remove the K-Cup Pod Holder Assembly from your brewer. First lift the Handle to open it. Next, grasp the top of the K-Cup Pod Holder with one hand. Using your other hand, push up on the bottom of the K-Cup Pod Holder Assembly until it releases from the device. This will allow you to remove the holder and access the internal components for cleaning or maintenance. After cleaning, align the K-cup holder by using the two front ribs as a guide and then fit it into place from the top.
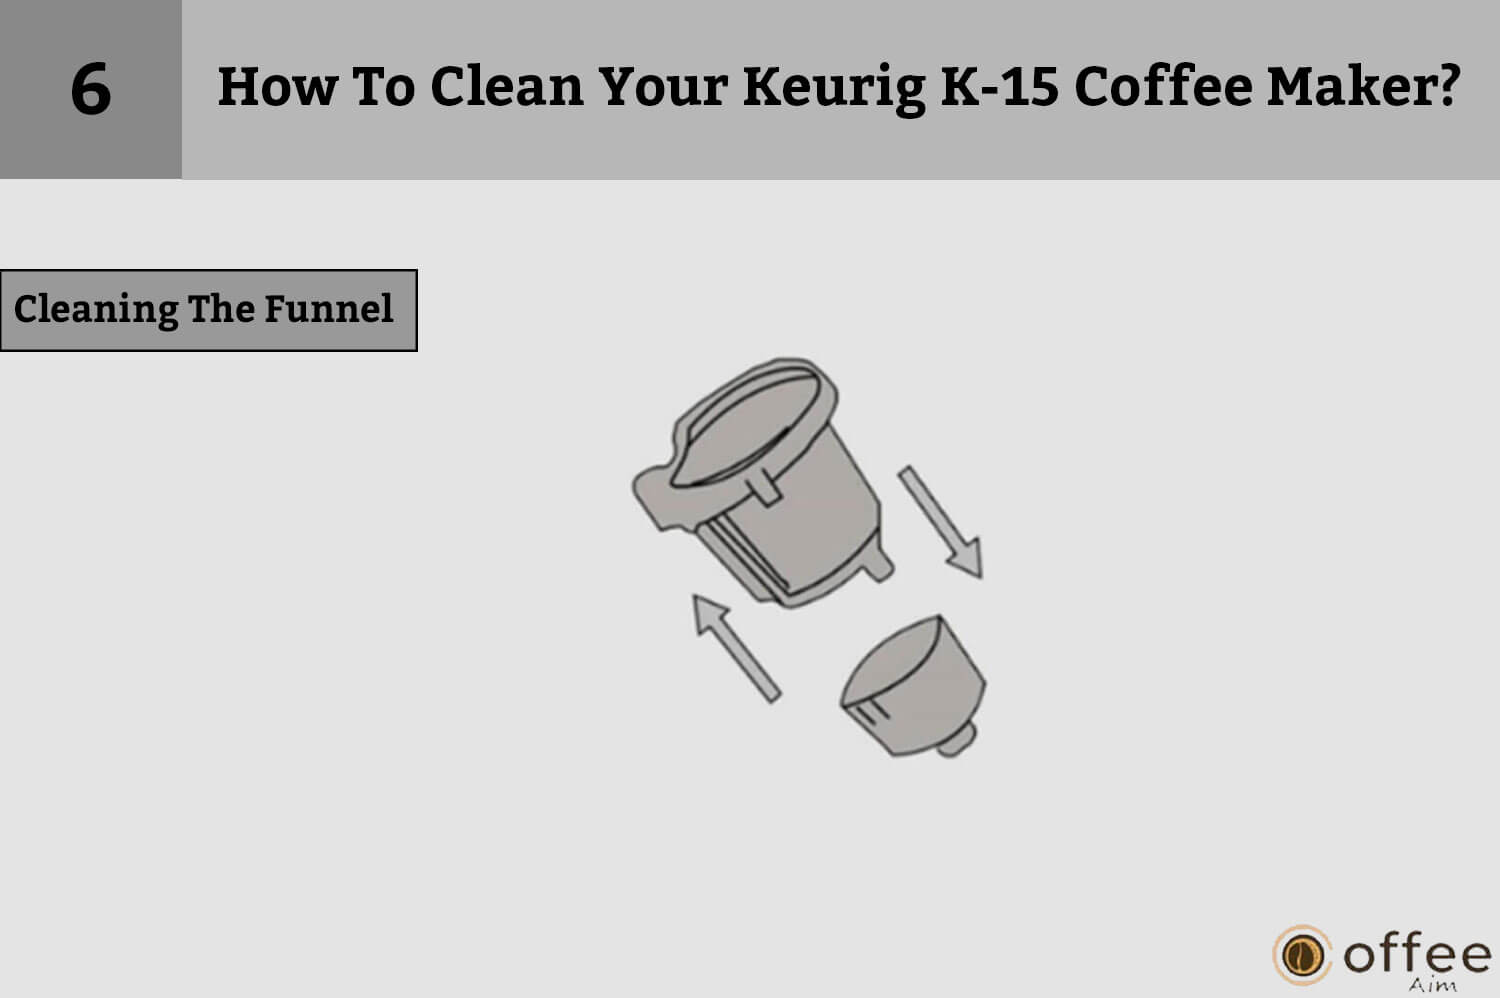
Now detach the Funnel from the K-Cup Pod Holder by simply pulling it away from the holder until it snaps free. This should be done gently and with care to avoid any damage to the device or the components being separated. Hold the funnel upside down underneath the water to rinse any residue out.
After cleaning, reattach the Funnel to the K-Cup Pod Holder; simply align the two components and snap the Funnel back into place.
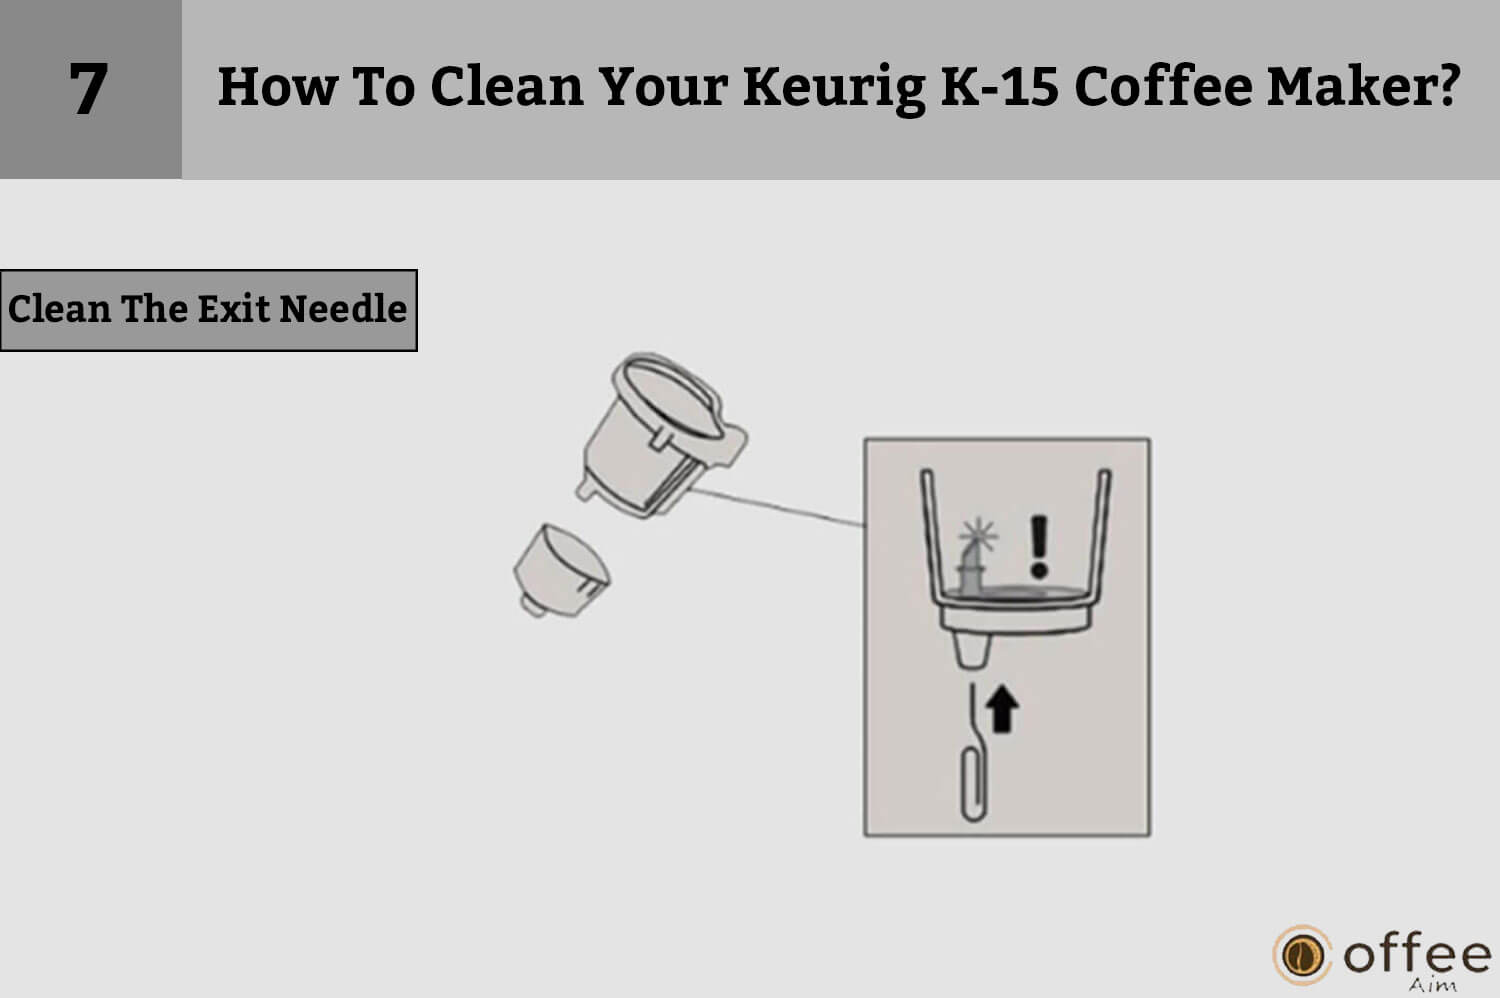
Now clean the Exit Needle located at the bottom of the K-Cup Pod Holder. You can use a paper clip or similar tool to remove any clogs caused by coffee grounds or other debris. It is important to insert the tool from below the needle to avoid any damage to the device or harm to yourself. However, it is recommended to avoid using sharp needles on the K-Cup Pod Assembly Housing. Additionally, it is important to avoid putting your fingers inside the K-Cup Pod Assembly Housing to prevent any injury or damage to the internal components. By following these guidelines, you can maintain the cleanliness and functionality of your device and ensure that it continues to produce high-quality beverages.
Reattach the K-Cup Pod Holder Assembly by aligning the holder with the device’s opening. You can use the two front ribs on the holder as a guide to ensure proper alignment. Once correctly aligned, snap the holder into place from the top until it is securely attached to the device. It is essential to perform this step carefully and with precision to avoid any damage to the device or the components being reattached. Once completed, the device is ready to brew your favorite beverages.
Now it is time to empty the internal hot water tank, but before starting, ensure that the brewer is plugged in but turned off.
It’s essential to understand that your coffee maker can be susceptible to a mineral buildup over time, which can negatively impact the taste and performance of your coffee maker. Not only can this affect the quality of your coffee, but it can also lead to a shorter lifespan for your coffee maker. Descaling on a regular basis, typically every 3 to 6 months, is important to maintain the quality and functioning of the internal components that come in contact with water. Let’s look into the detailed process.
For Descaling, you will need to gather several items: a large ceramic mug, fresh water, a descaling solution, and access to a sink.

To begin the descaling process, the first step is to rinse the water reservoir and fill it with the descaling solution. To avoid any problems, follow the steps accurately.
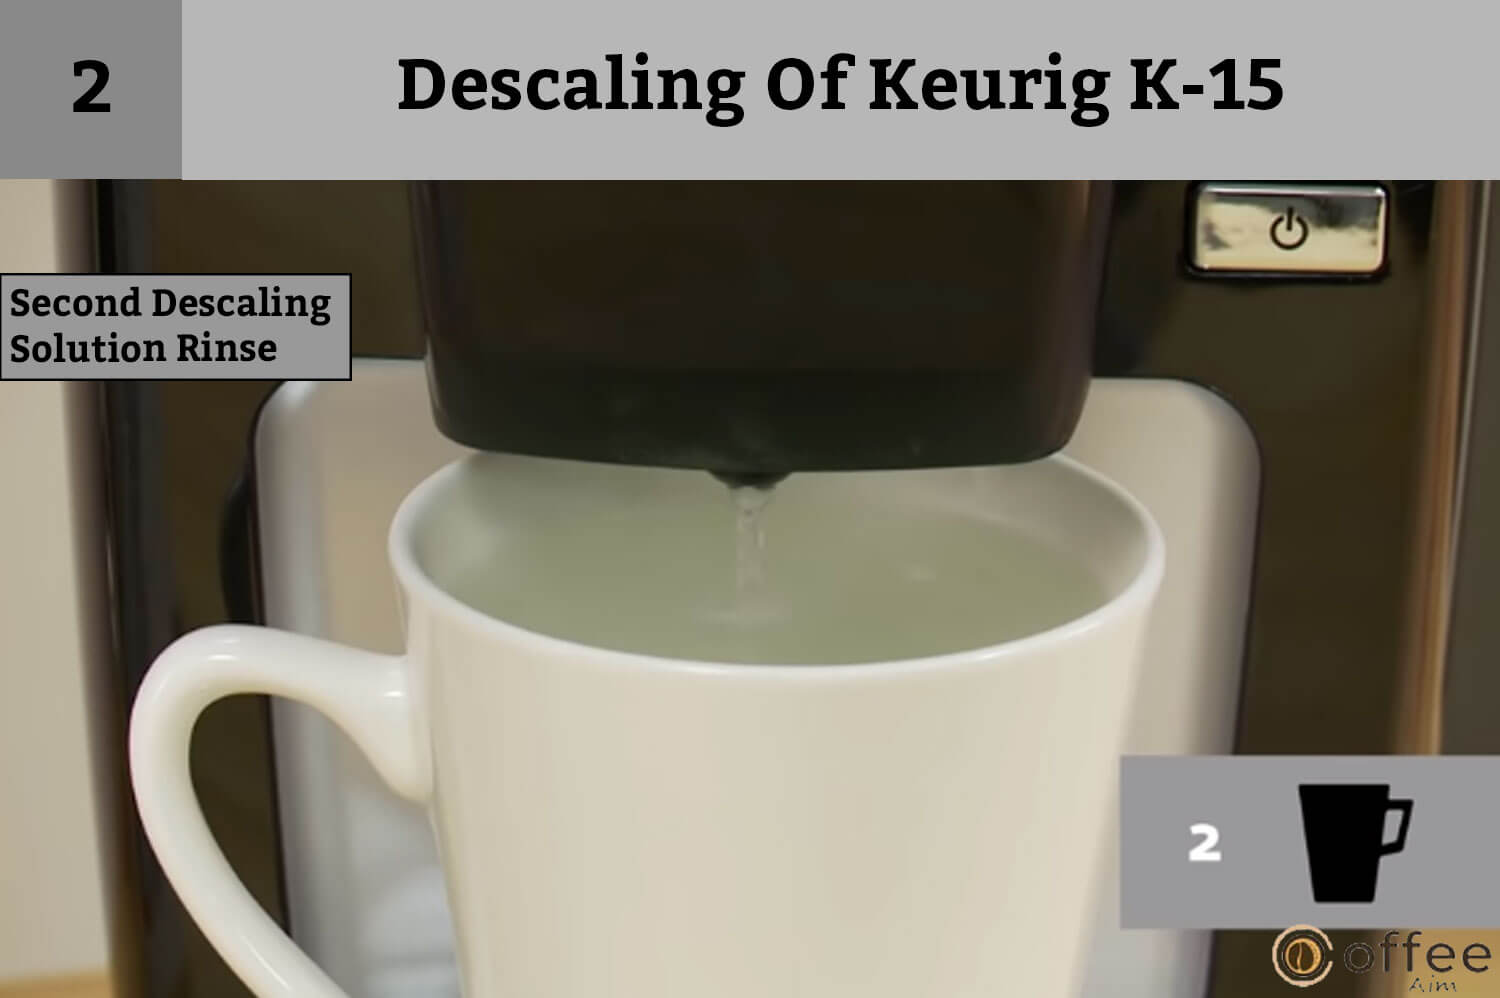
Repeat the procedure of descaling solution the same as above. Next, power off when the Brew Button turns solid red, as it will start to dispense the solution. Power off your brewer before pouring the descaling solution into the tank. Leave this solution in the reservoir for 30 minutes.
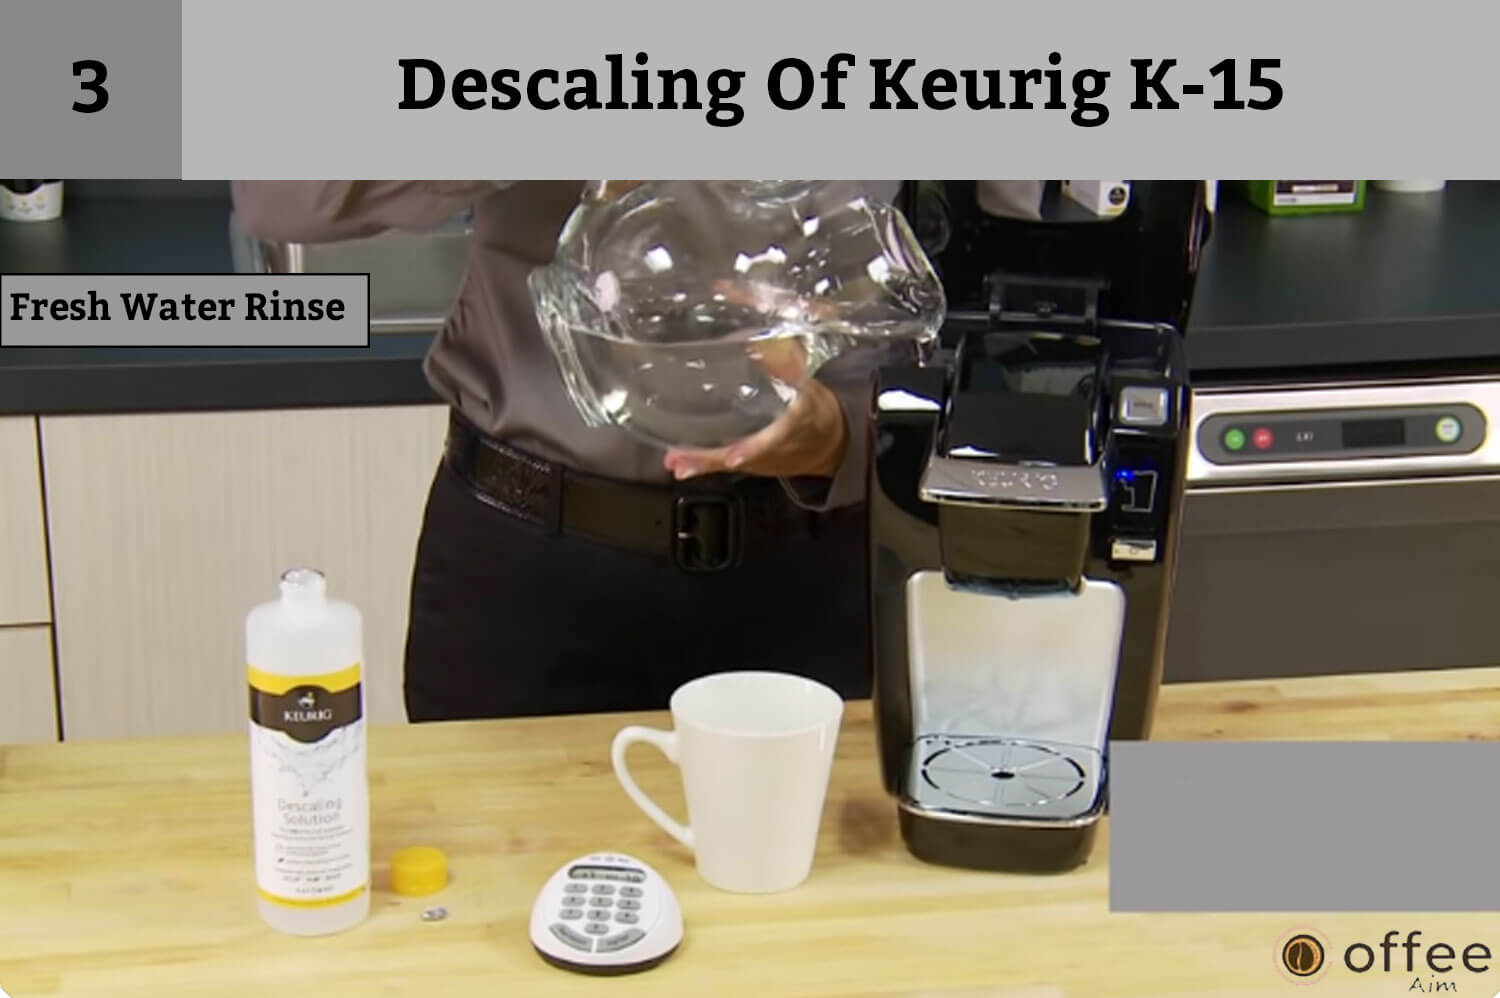
Repeat step 1 (3 times) using 10 oz of fresh water each time.
If you notice any residue or a taste difference in your coffee after descaling. You should try rinsing your brewer with fresh water again and again.
The cleaning action of Keurig’s descaling solution results in foam appearing and dispensing from the brewer. If this occurs,
Proper maintenance and storage of your Keurig brewer are crucial for ensuring its longevity and continued performance. Whether you are storing your brewer for a short time or an extended period, there are a few important steps you should take to ensure that it remains in good condition
Keurig k-15 has a convenient compartment to hold the power cord during transport and storage.
As a user of Keurig K-15, you may sometimes find yourself in trouble while using your coffee maker. However, there is no need to get panicked as there are many solutions for the minor glitches your brewer can produce. Therefore I have gathered all information related to troubleshooting in one place just for your convenience.
When you plug in your Keurig K-15 machine and press the power button, the power icon will illuminate, and the ADD Water indicator should flash a blue light. But if these things don’t happen, there’s a problem with the Keurig K-15 Coffee maker.
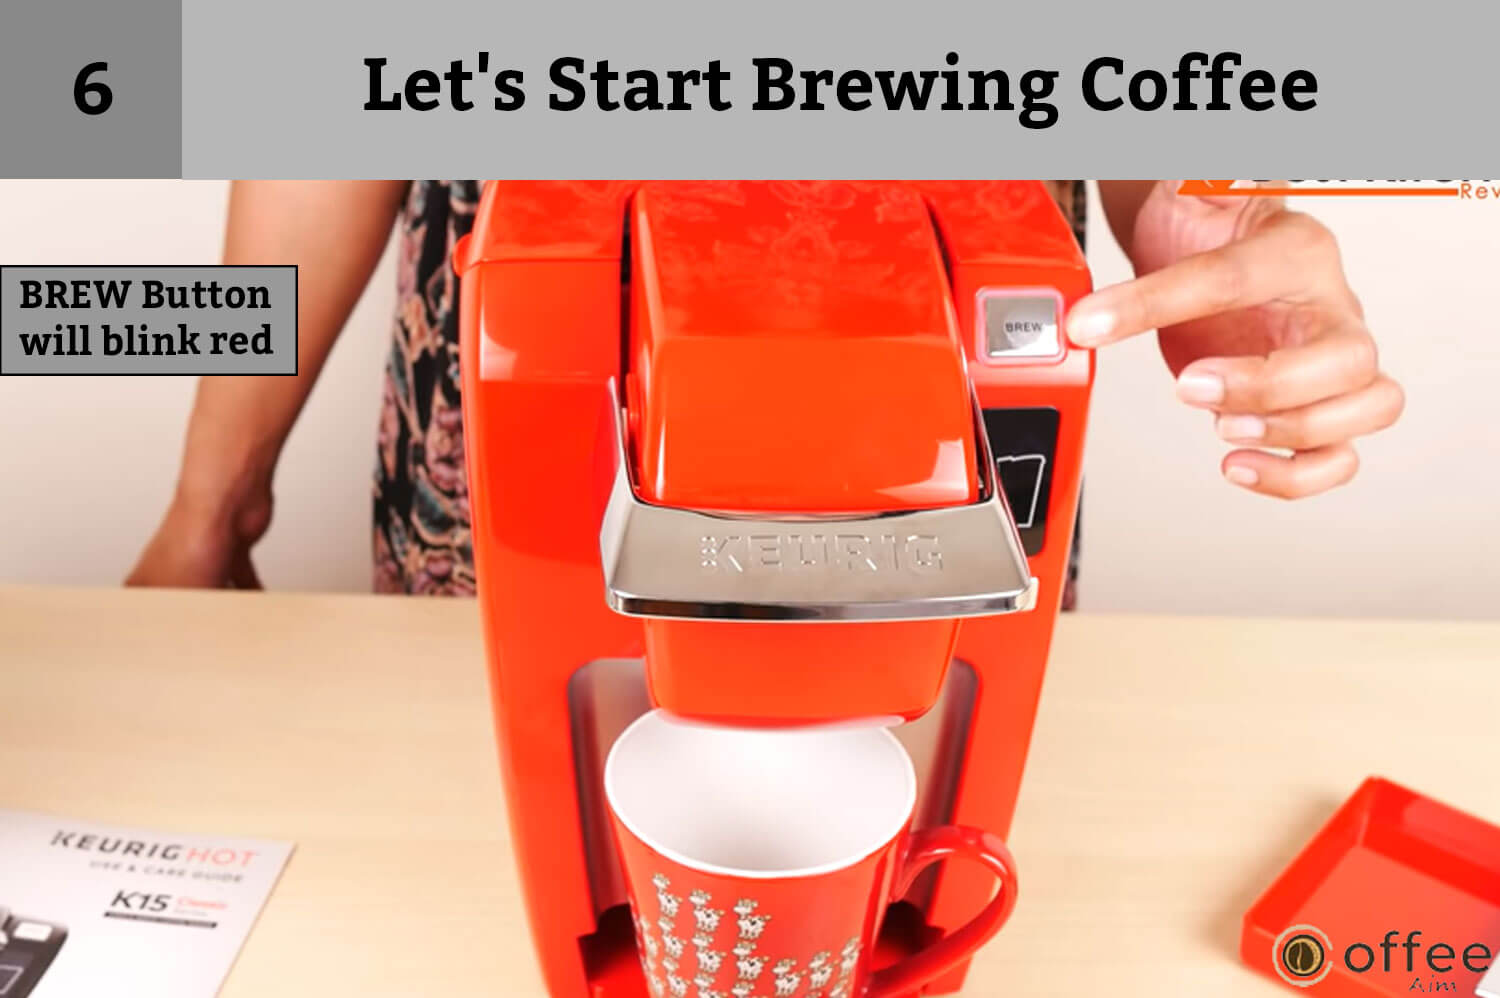
Normally, the BREW Button will flash a red light when the brewer is heating and turn solid red when brewing. If the BREW Button flashes a red light longer than 3 minutes, you may resolve it by contacting Keurig Customer Service.
When your Keurig k-15 brewer does not brew a cup of coffee or hot water, it means there are severe issues. You can efficiently resolve this problem by following the mentioned procedure. You can solve the case only by following the guidelines given below.
The Keurig k-15 brewer may be cold. Let it rest at room temperature for at least 2 hours before powering on.
Finally, I’d like to share some practical ideas you may utilize during your brewing experience. Hopefully, these hints will make your brewing experience more exciting and easy.
Your brewer may malfunction if the electric circuit is overloaded with other appliances.
Before making your first beverage, perform an initial cleansing without inserting a K-Cup pod.
Your brewer makes one fresh beverage at a time. You must add fresh water each time you brew because the K15 does not store water in the reservoir.
For the best-tasting gourmet coffee, tea, or hot cocoa, Keurig recommends using bottled or filtered water. I recommend against utilizing distilled or reverse osmosis water. Note that water quality can vary from place to place. If you detect an unpleasant flavor in your drink, such as chlorine or other mineral substances, I recommend trying bottled water or water from a filtration system. Follow the instructions of the manufacturer for the best output when using any water filtration system.
With over a hundred varieties of K-Cup pods and multiple fill levels; it provides endless customization options – so that you can create the size, flavor, and strength of each beverage perfect for you.
IMPORTANT: Do not brew into a cup made of glass. Doing so may cause the glass to crack or break.
Our iced tea and coffee taste best when freshly made and served over ice. Place a large cup of ice on the Drip Tray, then select your favorite K-Cup® pod. Look for the “Brew Over Ice” icon on K-Cup® pods, mainly designed to brew over ice! IMPORTANT: Do not brew in a glass cup. It might cause the glass to shatter or break.
To brew into a tall mug, remove the Drip Tray Assembly and place the tall cup on the Drip Tray Base. However, with the Drip Tray Assembly, you can retain the benefit of the Drip Tray containing any excess liquid.
Drip dray will catch any liquid overflow from your cup or the Cold Water Reservoir. Be sure to empty the Drip Tray when the red Drip Tray Overflow Indicator pops up.
As a safety feature, your brewer will shut off automatically when idle for over 90 seconds. Press the Power Button to restart.
To keep your brewer looking and performing at its best, clean the external and internal components regularly.
Calcium deposits or scales may build up in your brewer, depending on the mineral content of the water in your area. Scale is non-toxic, but it can hinder brewer performance if left unattended. Regular descaling of your brewer helps to preserve the heating element and other internal components that come into contact with water.
When storing your brewer, empty the Drip Tray. Follow the instructions for unpacking the Internal Hot Water Tank. Store your brewer upright in a safe, dry, frost-free environment.
This brewer is only user serviceable within the specified cleaning and maintenance procedures.
If there is any other query, call the Keurig helpline customer service number 1-800-361-5628.
If you are afraid that your Keurig may show some malfunctions or any unidentified issues, don’t worry because Keurig K-15 comes with a 1-year warranty for functional errors. Keurig wants to retain your trust and investment by providing this warranty. Know the terms and conditions of the warranty policy.
Though Keurig Company has tried to present a warranty offer, however, the warranty for the Keurig B-41 has certain limitations, as not all types of damage or malfunctions are covered in this.
Such as property damage does not cover unexpected costs and expenses resulting from this warranty, even if foreseeable.
The several other limitations of the warranty are mentioned below.
If, unfortunately, you have to avail yourself of the warranty service, follow the steps below.
Keurig Green Mountain, Inc.
33 Coffee Lane
Waterbury, VT 05676
1.800.361.5628
Savor life with endless cups of delicious espresso made effortlessly in your Keurig K-15. With all your questions answered through this article, you can confidently enjoy your coffee without any complications. Treat yourself to a rich and satisfying coffee because you deserve it. For even more coffee-related information, visit https://coffeeaim.com/ to delve into a world of coffee knowledge. Join us in exploring the exciting world of coffee.
Have a delicious cup of coffee!
The Keurig K-15 is not equipped with a water filter and is not compatible with Keurig’s charcoal water filters. It is recommended to use pre-filtered water when using the K-15 model.
All Keurig machines do not work with all K-Cup pods as there are three different pod sizes (mini, original, and XL), and not all can accommodate all three sizes.
K-Cups are incompatible with Nespresso machines as the pods and machines’ sizes, shapes, and technical specifications are different. If this is a concern, you can explore alternative options for Keurig. The difference between K-Cups and pods is also discussed elsewhere.
Most Keurig customers report that their machines last for an average of 3-5 years. However, some signs may indicate the need to replace your Keurig sooner, such as if your coffee is not coming out piping hot.
Copyright © 2024 CoffeeAim.com