| Please Wait Loading ..... |
 |
Quick Navigation
Are you a coffee lover? And that love forced you to buy the Keurig K-Cafe machine? You have been using Keurig K-cafe but lost your manual and are now facing some issues while operating your device. Let me clear all your queries with my detailed guide on “How to use Keurig-K Cafe.” So without any delay, let’s dig into the guide!
I know reading precautions is boring stuff, but safety always comes first. Therefore, to ensure your safety and your machine read all the safety precautions thoroughly before starting the machine to avoid any inconvenience.
I know you are responsible and must have gone through the specification before purchasing your Keurig K-Café. However, let me introduce you to more detailed specifications so that you can analyze whether it is a good fit for your home. If you consider it unsuitable for you and your home, you must return it before using it. Let’s discuss the specifications!
| Specifications | Detail |
| Product Line/System | K-Cafe |
| Brew Sizes | 6 oz, 8 oz, 10 oz, 12 oz |
| Water Reservoir | 60 oz |
| Display | Button control panel with buttons for Brew Size, Coffee or Latte/Cappuccino, and Brew Strength |
| Temp Control | No |
| Strength Control | Yes |
| Dimensions | 15.3″ W x 11.7″D x 12.5″H |
| Weight | 10.0 lbs |
| Other Features | Milk frother, one-push speciality beverages |
The Keurig K-Cafe machine has several remarkable brewer features, including a large 60-ounce water reservoir, a potent brew button for bolder coffee, and an energy-saving programmable auto-off feature. It can hold a variety of cup sizes ranging from 6 oz to 12 oz and comes with an adjustable drip tray for easy cleaning. With its advanced brewing technology, the K-Cafe machine consistently produces flavorful and customizable coffee drinks. Now we will discuss every feature of Keurig K-Cafe one by one in detail.
The Frother of Keurig K-Cafe allows you to make various creamy and frothy drinks, such as lattes, cappuccinos, and hot cocoa. Its simple control button will enable you to select the desired froth consistency easily. With this versatile and convenient frother, you can adore coffeehouse drinks at the ease of your residence.
The Keurig K-Cafe machine includes a dedicated shot button for brewing an intense shot of coffee, making it ideal for making rich and flavorsome lattes and cappuccinos. This brewing technique produces a bold and robust flavor that can withstand the addition of milk and other ingredients, making it simple to create a variety of delicious speciality drinks.
The Keurig K-Cafe machine includes a handy COLD button for making cold, frothed milk, which is ideal for making soothing iced lattes and cappuccinos. The button starts a one-of-a-kind brewing process that turns cold milk into a frothy and creamy base for your favorite iced coffee beverages. You can easily enjoy your favorite cold coffee drinks in the warmth of your own house with the COLD button.
The Keurig K-Cafe machine includes a Strong Brew button for boosting the flavor and intensity of your coffee. By clicking the button, you can start an excellent brewing method that results in a bolder and richer coffee flavor. This feature is perfect for those who prefer a full, fuller-bodied cup of coffee. You can easily customize your coffee to your taste preferences with the Strong Brew button and enjoy a more intense quality of coffee.
The Keurig K-Cafe machine has a unique Smart Start function that speeds up brewing. You no longer need to wait for the brewer to warm up before choosing your cup size with Smart Start. Instead, turn the machine on, place your mug inside, insert a K-Cup pod, and lower the handle. After that, select your cup size and press the brew button. The brewer will heat up and begin brewing your coffee automatically so that you can enjoy your beverage effortlessly and quickly. This feature is ideal for hectic mornings that require your coffee to be fixed promptly.
The brewer’s Auto Off feature turns off the device after 2 hours of inactivity, which helps save energy. If you do not want to use this feature, you can disable it by doing the following:
Follow these brewing instructions and activate the High Altitude Brewing Mode on your brewer to ensure that your brewer works properly at higher altitudes, such as 5,000 feet. To begin, raise the brewer handle and gradually press down on the K-Cup® pod in the pod holder until the exit needle punctures the bottom of the K-Cup® pod.
To allow the High Altitude Brewing Mode, perform the following steps:
Please turn off the brewer while it is plugged in.
When you open the box of Keurig K-Cafe, you’ll find a versatile coffee maker that can brew single-serve coffee, lattes, and cappuccinos with the included milk frother. You’ll also discover a sample pack of K-Cup pods to get you started on your brewing journey and a user manual that will guide you through the setup and operation of your new machine.
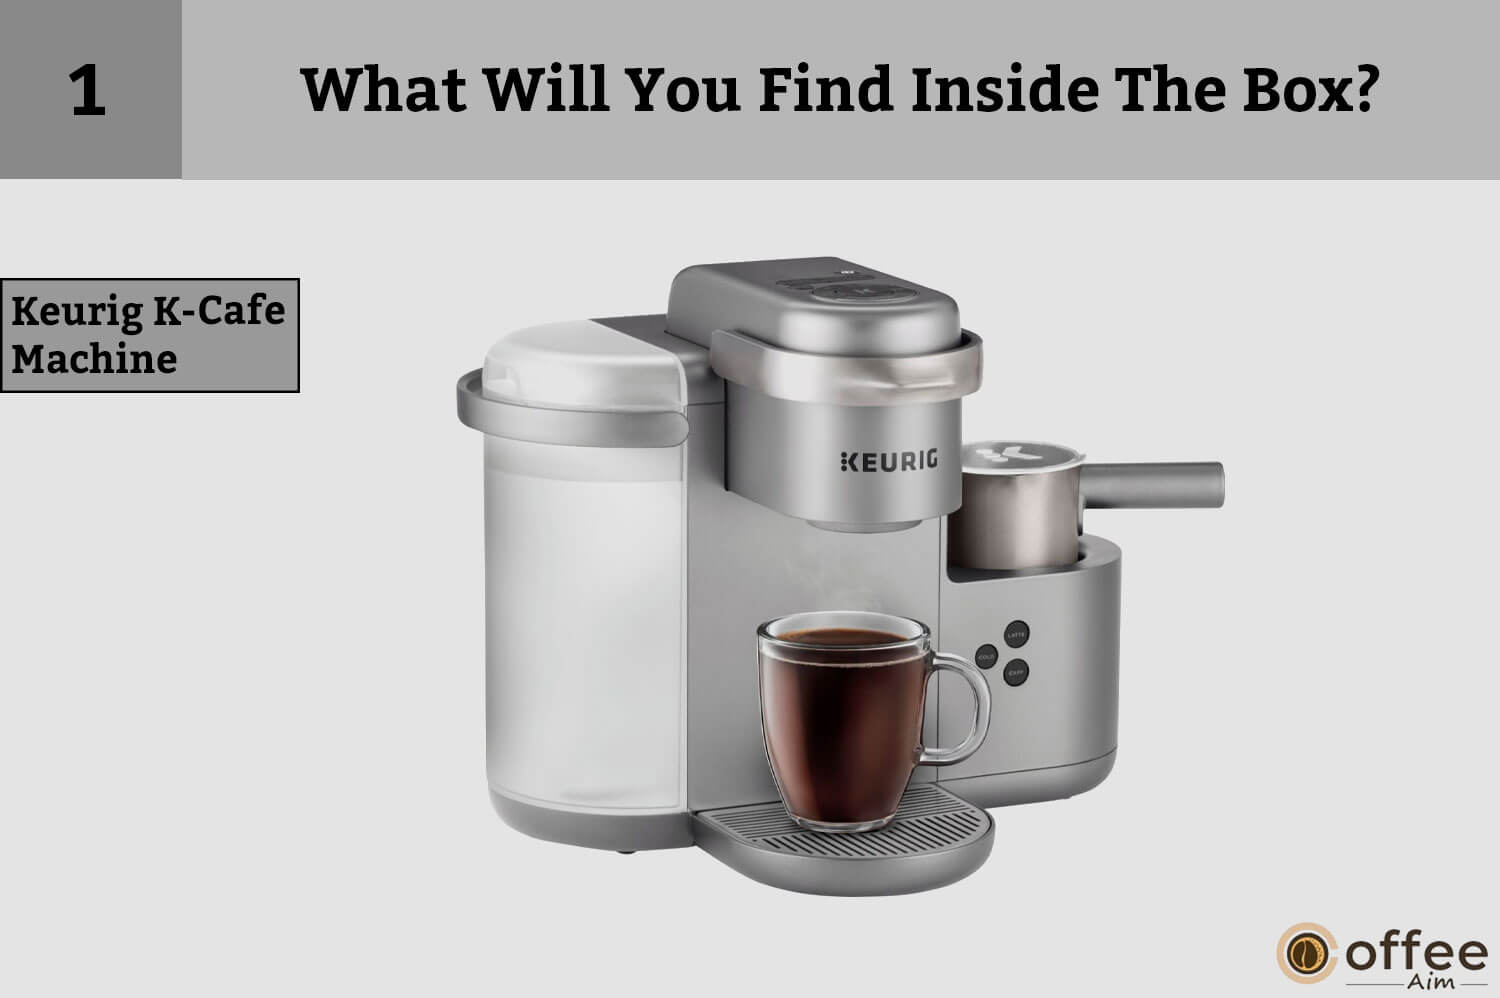
The main item of the box is the machine itself. We have placed the picture of the machine for your convenience so that you can check your parcel according to this.

A frother, which is used to froth milk for lattes and cappuccinos, should be included in the box.

The box should include a user manual that explains how to set up and use the K-Cafe.
It’s important to carefully inspect your coffee maker package upon arrival to ensure that all mandatory items are included in the box. If you find that any essential items are missing, it’s recommended that you request a replacement from the manufacturer or seller. Don’t hesitate to double-check everything to avoid any inconvenience and to ensure that you can start brewing your perfect cup of coffee as soon as possible.
Before you brew your first cup of coffee, you must have sound knowledge of all the parts and their usage to avoid any inconvenience. Here, I have enlisted all the parts with their images below. Let’s start!
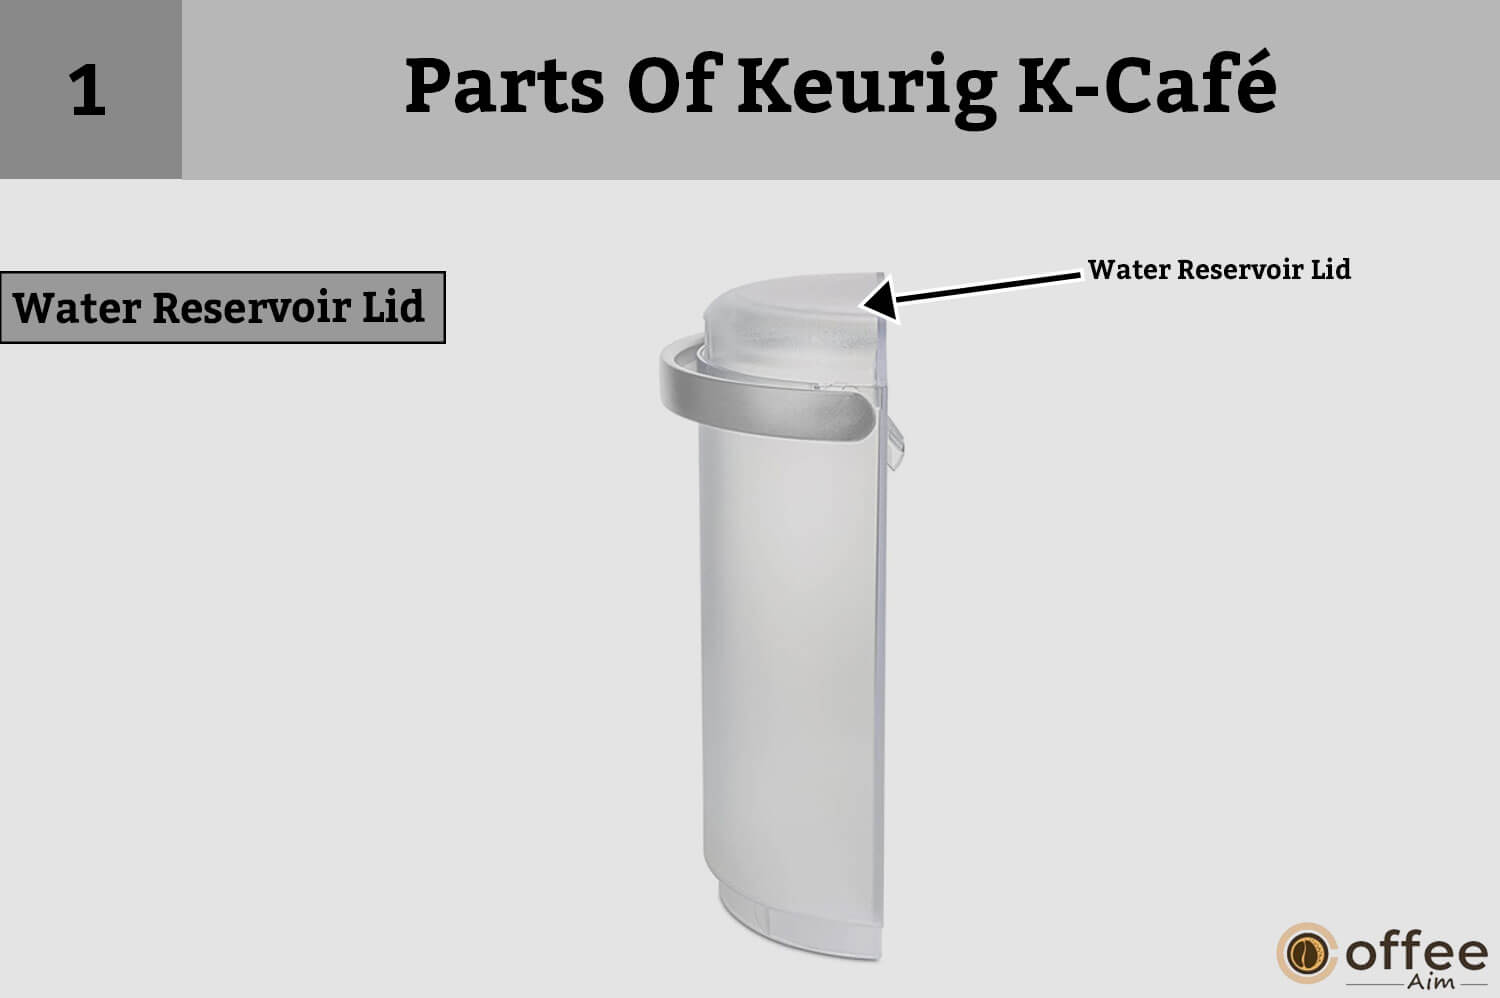
The Keurig K-water Cafe’s reservoir lid is designed to seal the water tank safely, preventing leaks or spills. It has a handy handle that makes removing and refilling the tank simple. A filter is also included in the lid to guarantee that the water used for brewing is impurities-free.
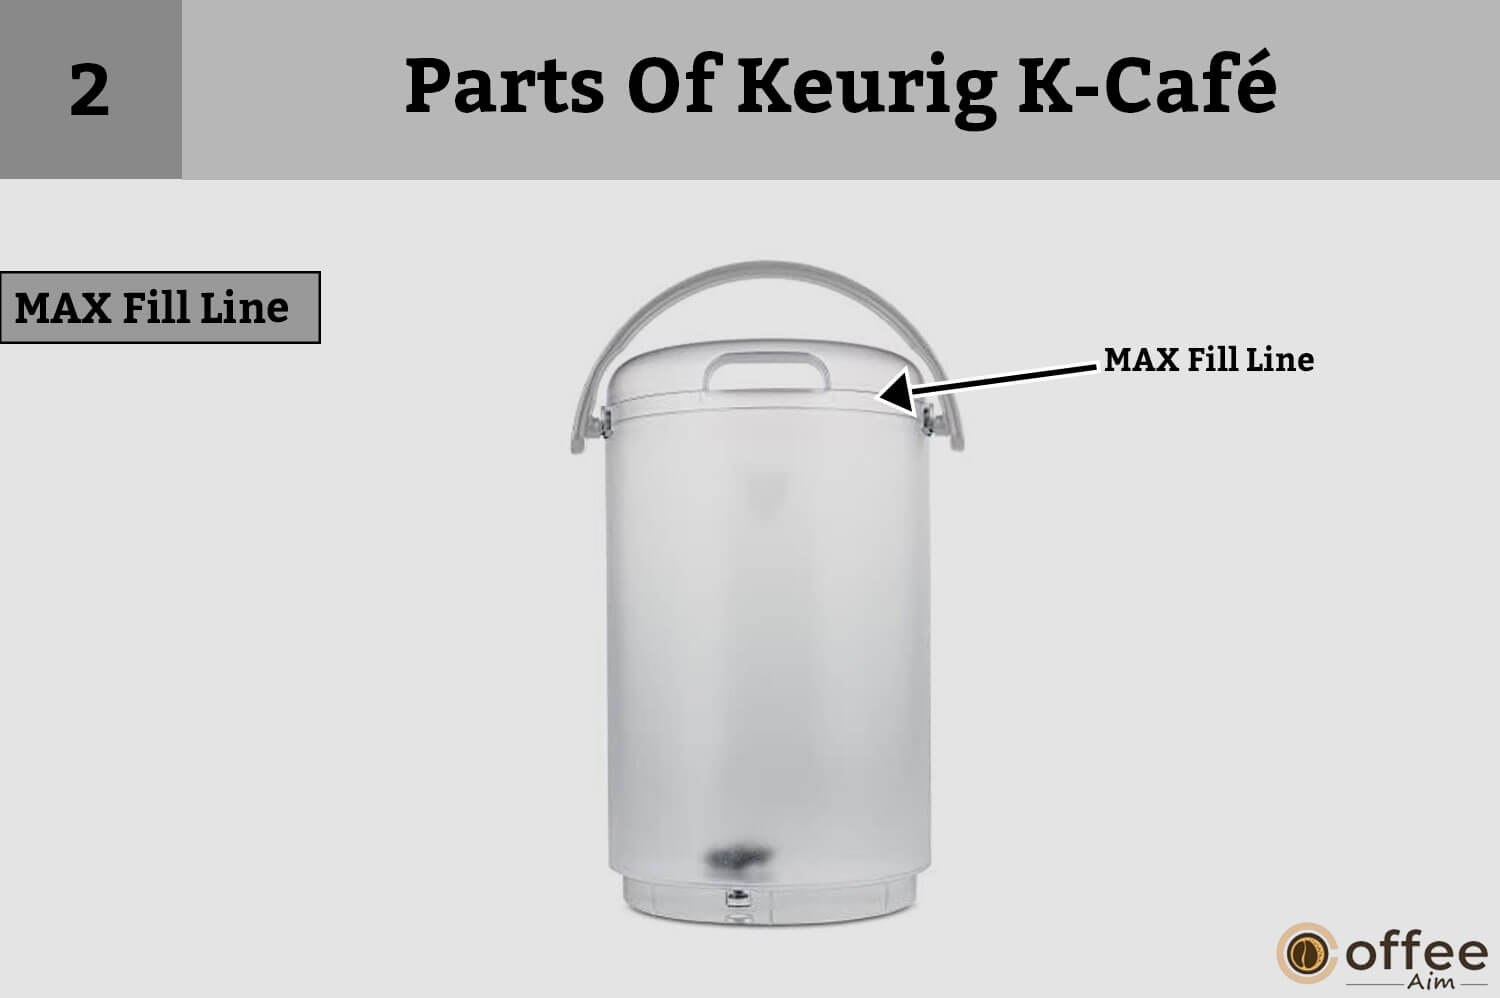
This line will help you to know the actual limit of filling because an over or underfilling reservoir will not work properly
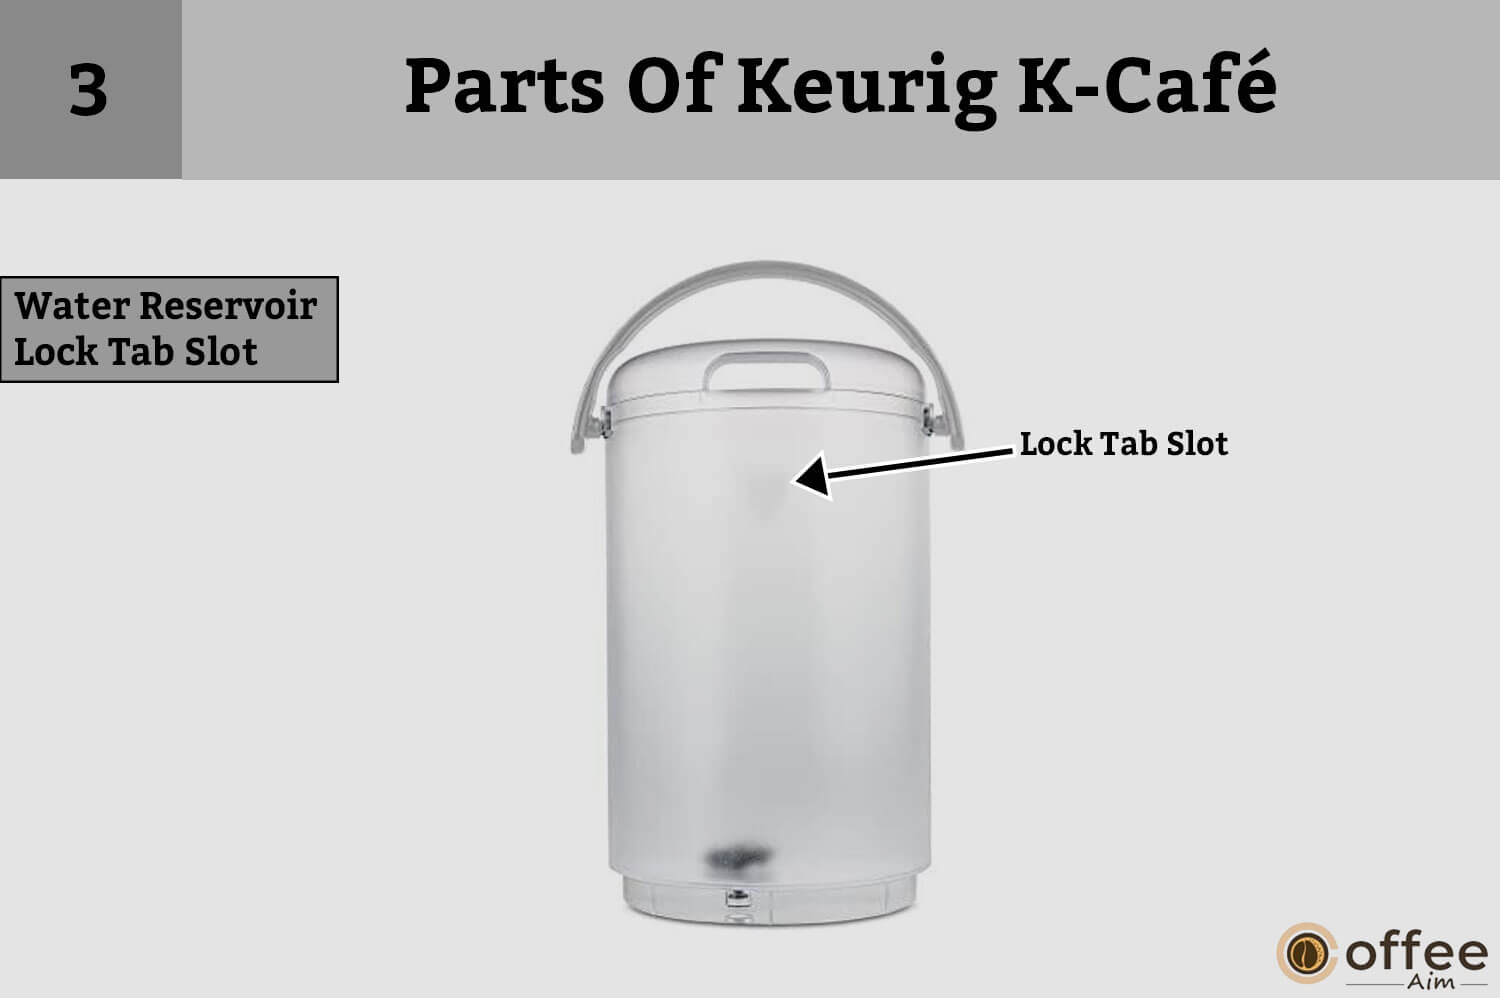
The Keurig K Cafe’s water reservoir has a lock slot that keeps it firmly in place while brewing coffee. This feature prevents spills and leaks and ensures a smooth, trouble-free coffee-making experience.
The Keurig K Cafe’s water reservoir is a detachable and easy-to-clean component that holds up to 60 ounces of water. It has a convenient handle for carrying and filling, as well as a water level signifier that tells you when it’s time to refill

The Keurig K-cafe power cord is a vital element that links the machine to a source of electricity. It is 3.3 feet long, allowing you to place the device anywhere. The cord also has a polarized plug, which ensures safe and dependable operation.

The Keurig K-cafe drip tray plate is a stainless-steel accessory placed on top of the drip tray. It offers extra defense to the tray and is easily removable for cleaning. The plate also has a nonstick surface to keep coffee and frothed milk from sticking.
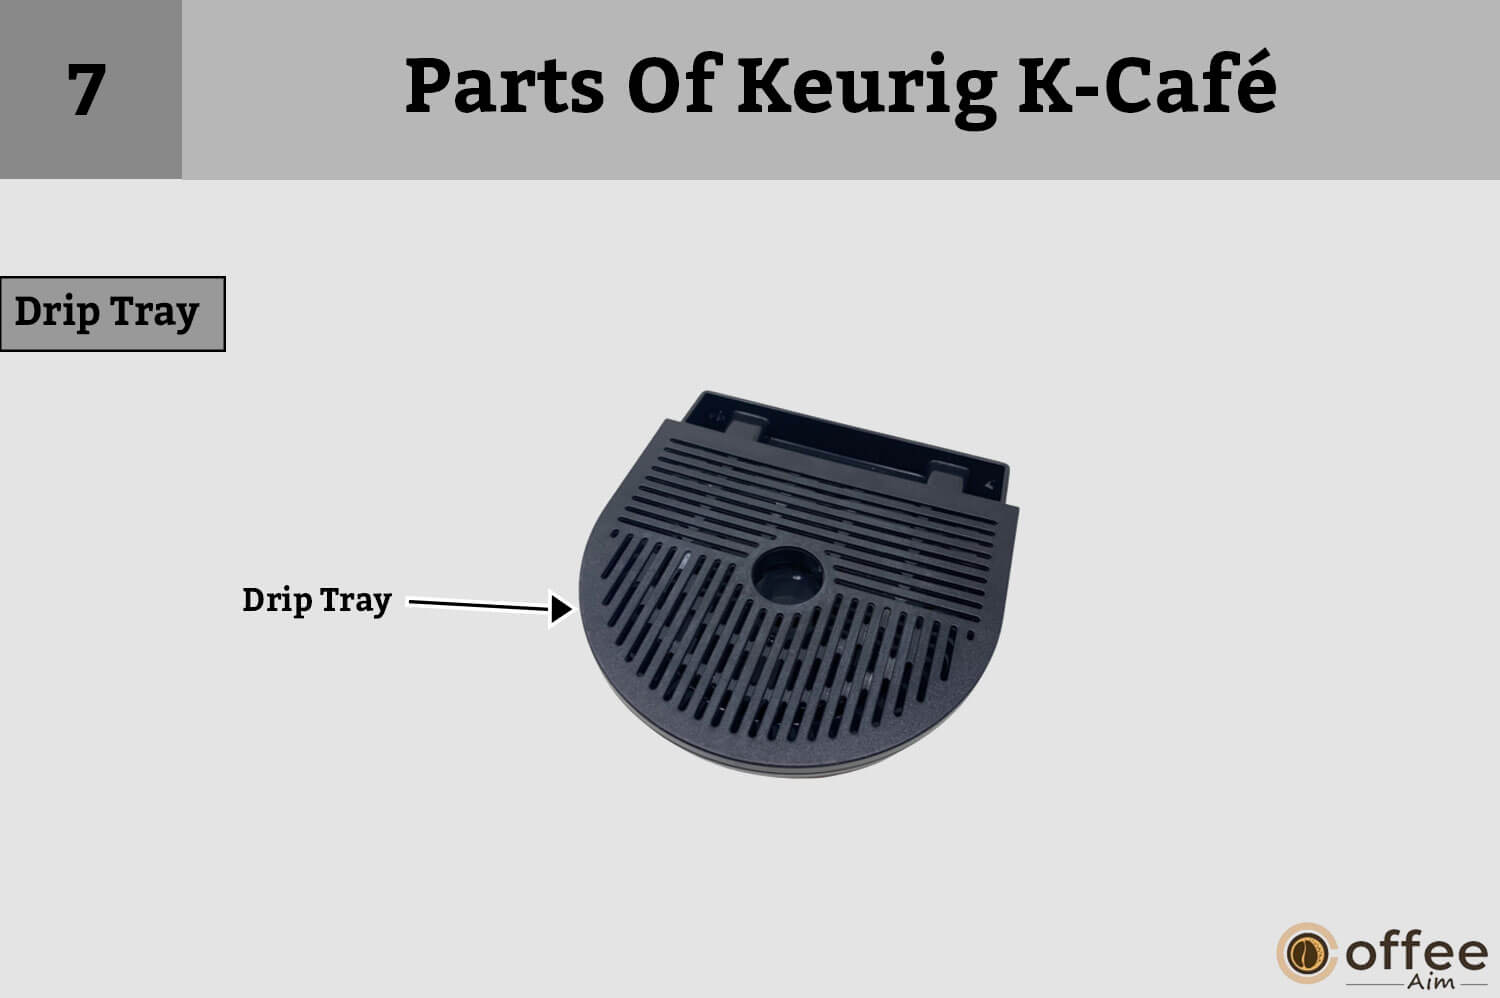
The Keurig K-cafe drip tray is a removable element at the device’s base. Its purpose is to catch any excess water or spills that may occur during the brewing or frothing process. The tray is dishwasher safe and easily removable for cleaning and upkeep.
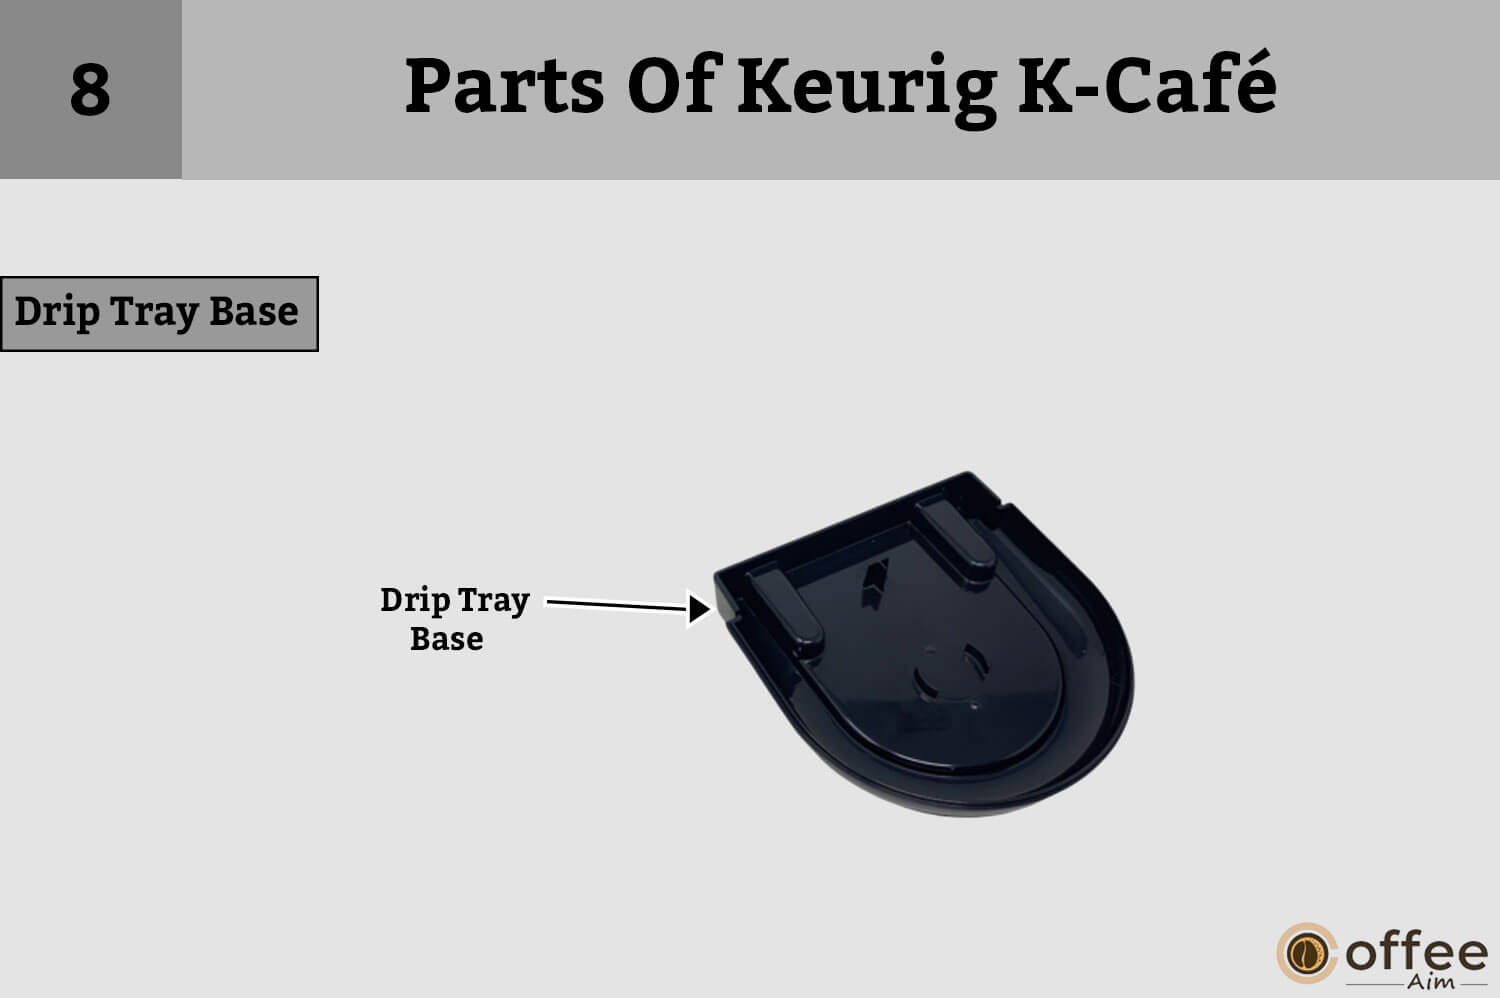
The drip tray base is present below the drip tray. It will protect to dip tray from slipping and also proves to be an excellent base to keep it in place.
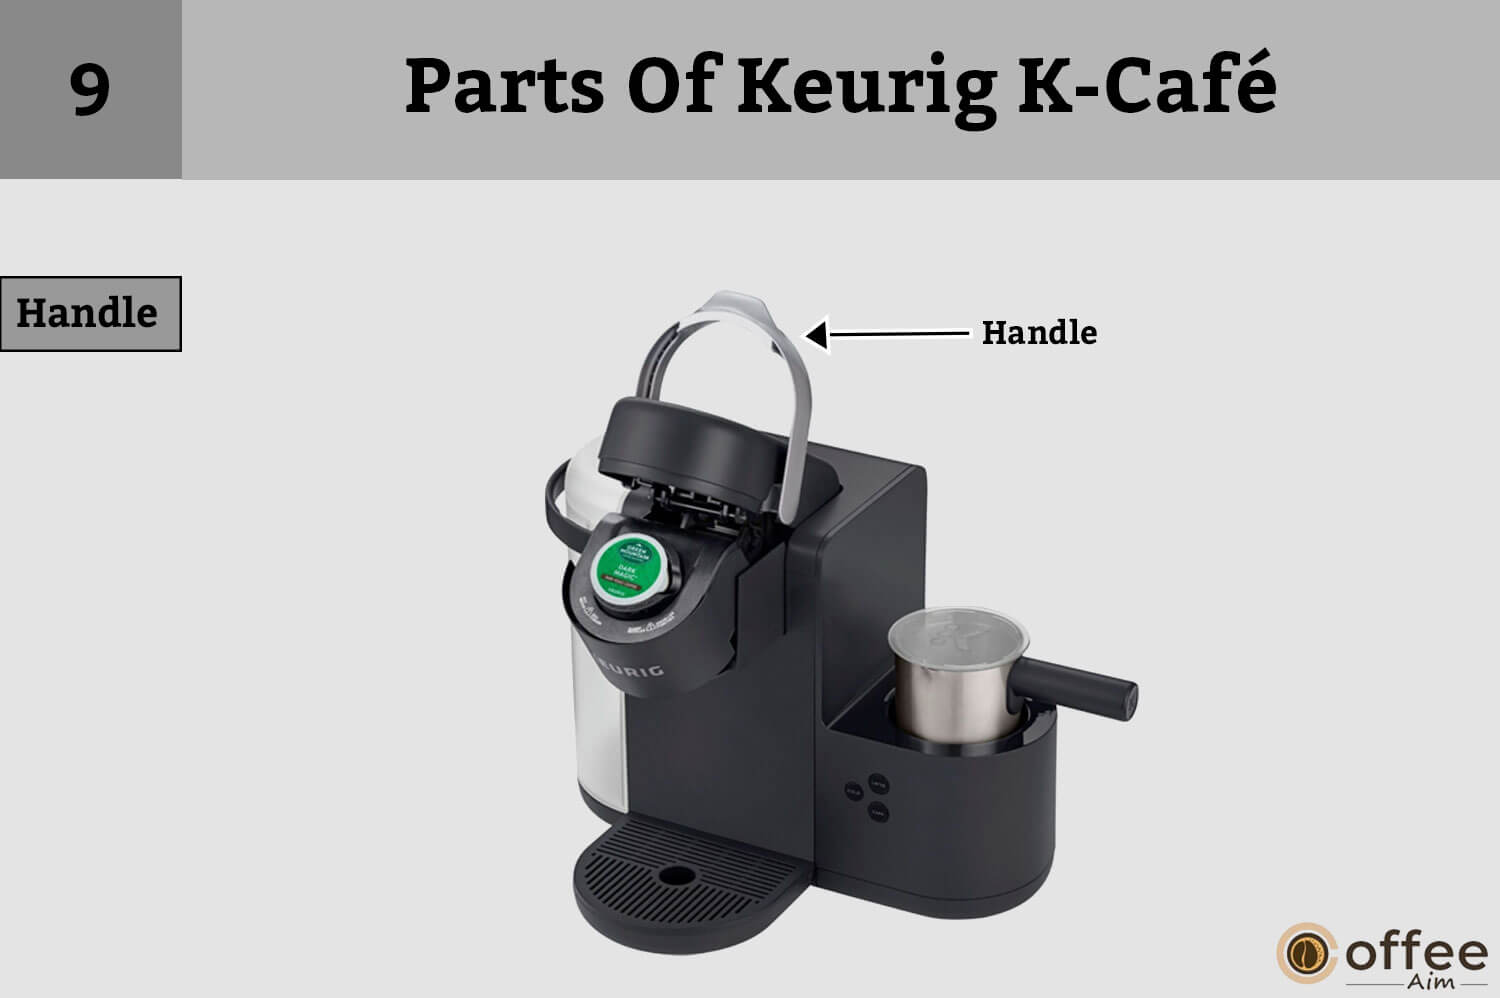
It is present at the top of the machine. It will help you to handle the device securely. It makes the machine portable and also convenient to take the device out of the box

The Keurig K-Cafe machine includes a handy K-Cup pod holder that can hold up to 24 pods at once, making preserving your favorite flavors on hand simple. The holder is also detachable, doing cleaning and refilling a breeze. You can enjoy a wide range of delicious single-serve beverages with the K-Cup pod holder.
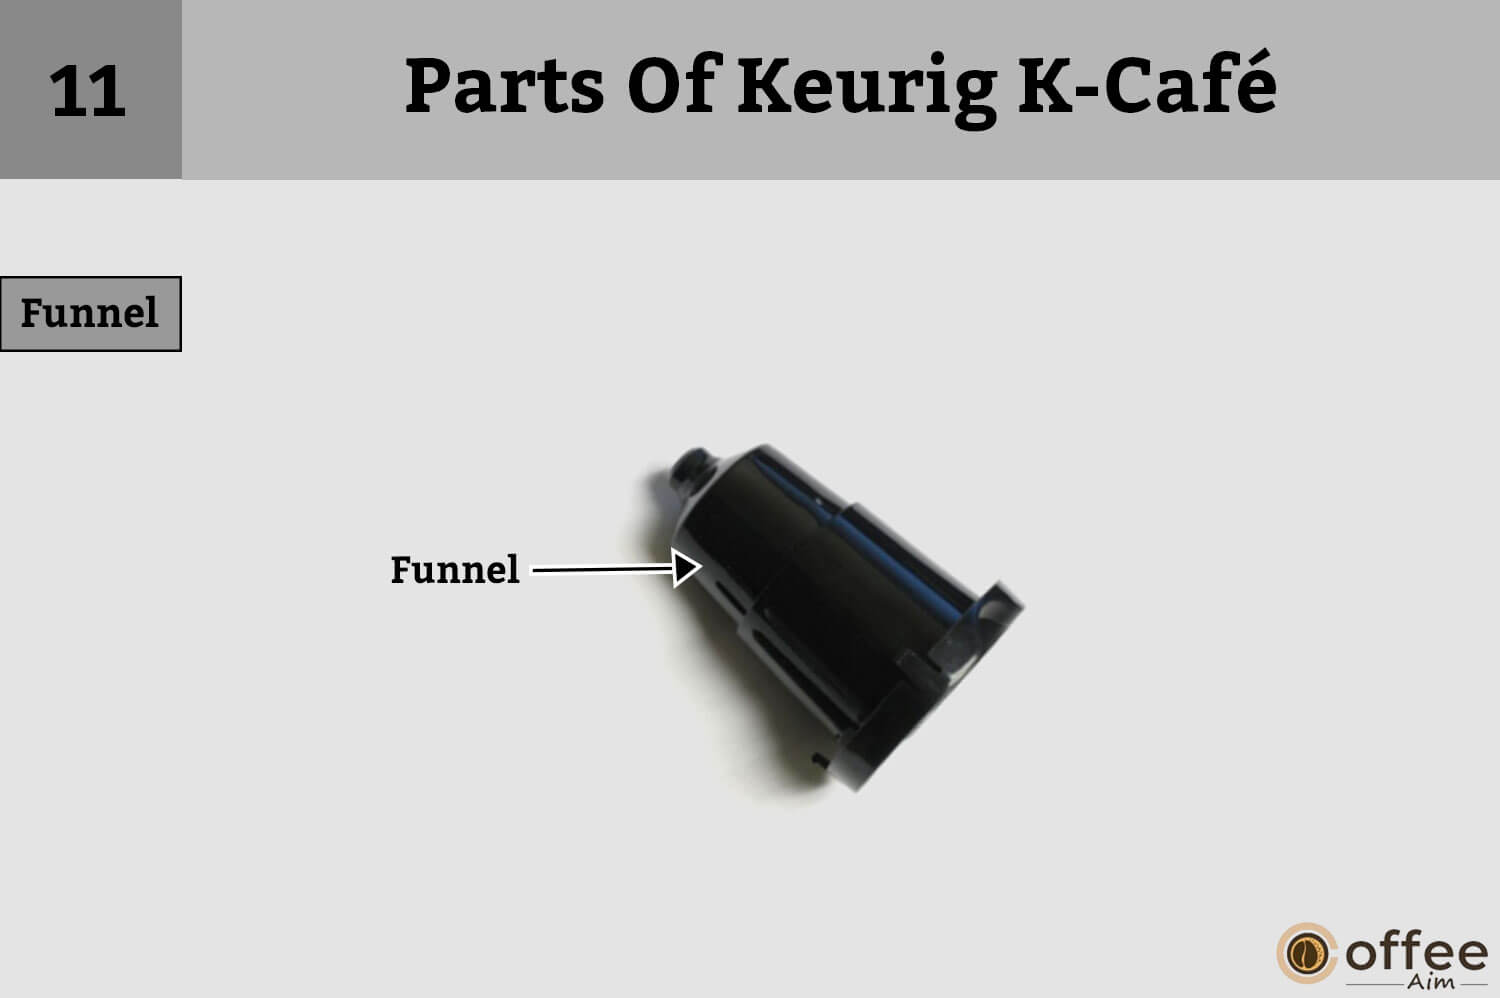
The Keurig K-Cafe machine includes a detachable funnel for guiding coffee beans or K-Cup pods into the brewing system. The funnel is intended to fit snugly into the machine, resulting in a seamless and mess-free brewing experience. The funnel is also dishwasher-safe, making cleaning and maintenance a breeze.
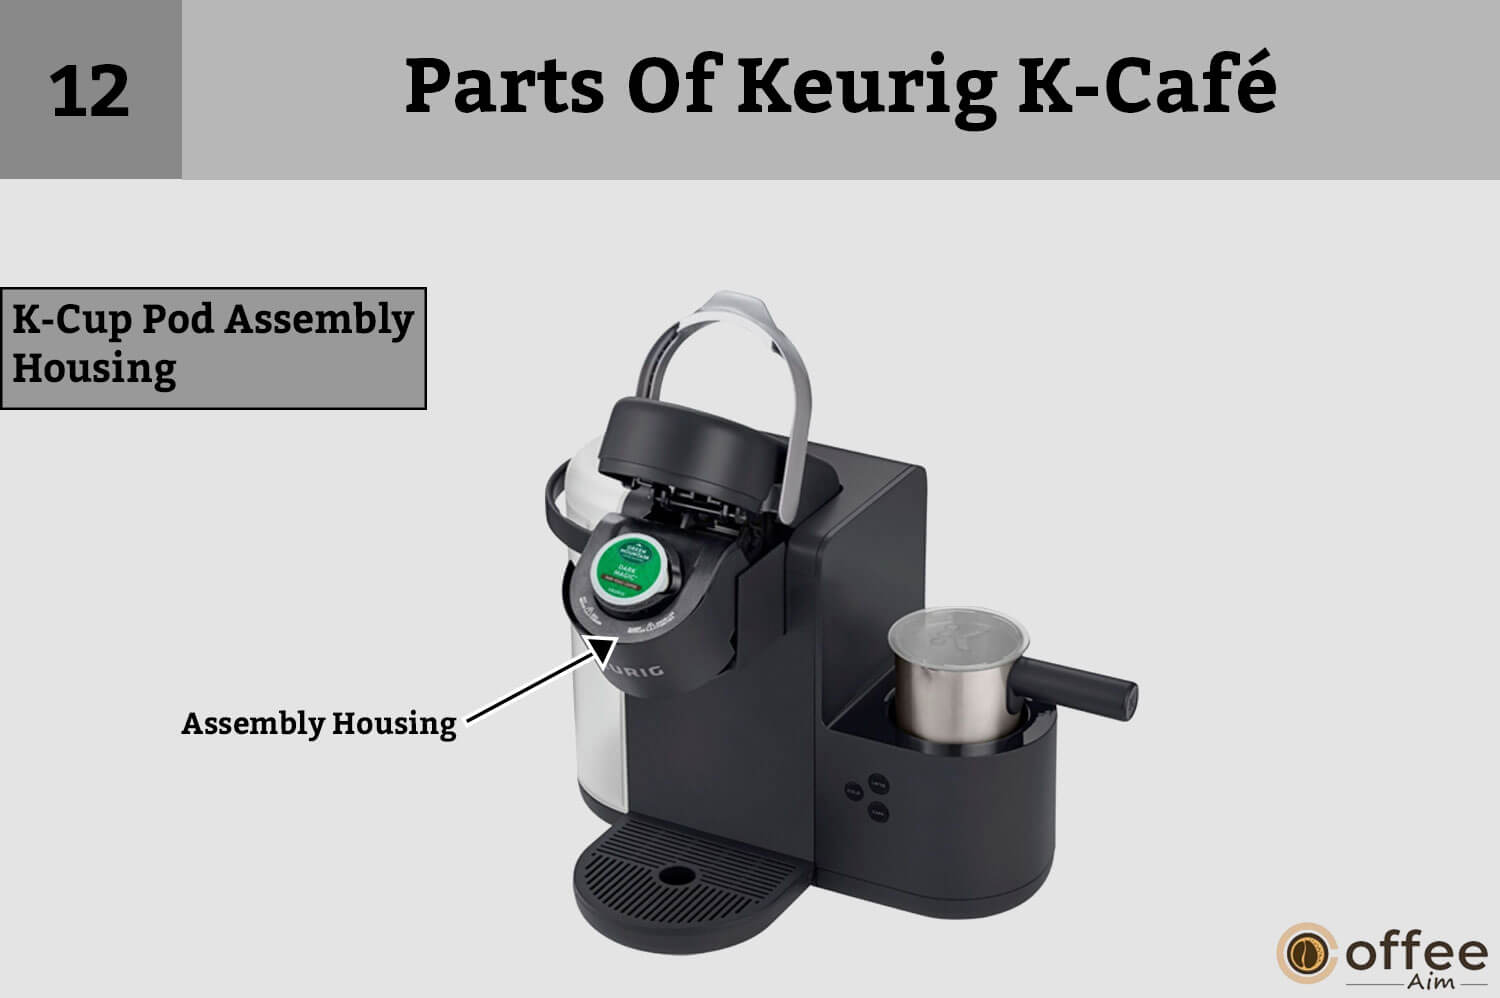
The Keurig K-Cafe machine’s K-Cup pod assembly housing is a critical component that retains the K-Cup pod during brewing. It has a puncture needle that pierces the pod, allowing hot water to flow through the grounds and produce a delicious cup of coffee. The housing is easy to clean and maintain, resulting in a long-lasting and increased brewing experience.

The Keurig K-Cafe machine’s frother lid is a removable component that connects to the frothing whisk. It is intended to aid in producing rich, fluffy froth for lattes and cappuccinos. For convenience, the lid is simple to clean and can be rinsed with distilled water in the dishwasher.

The Keurig K-Cafe machine’s frother whisk is a removable component that whips milk into a creamy and frothy consistency. It is made of durable components and is easy to remove and clean. You can make barista-quality frothed milk for your favorite specialty coffee drinks with the frother whisk.
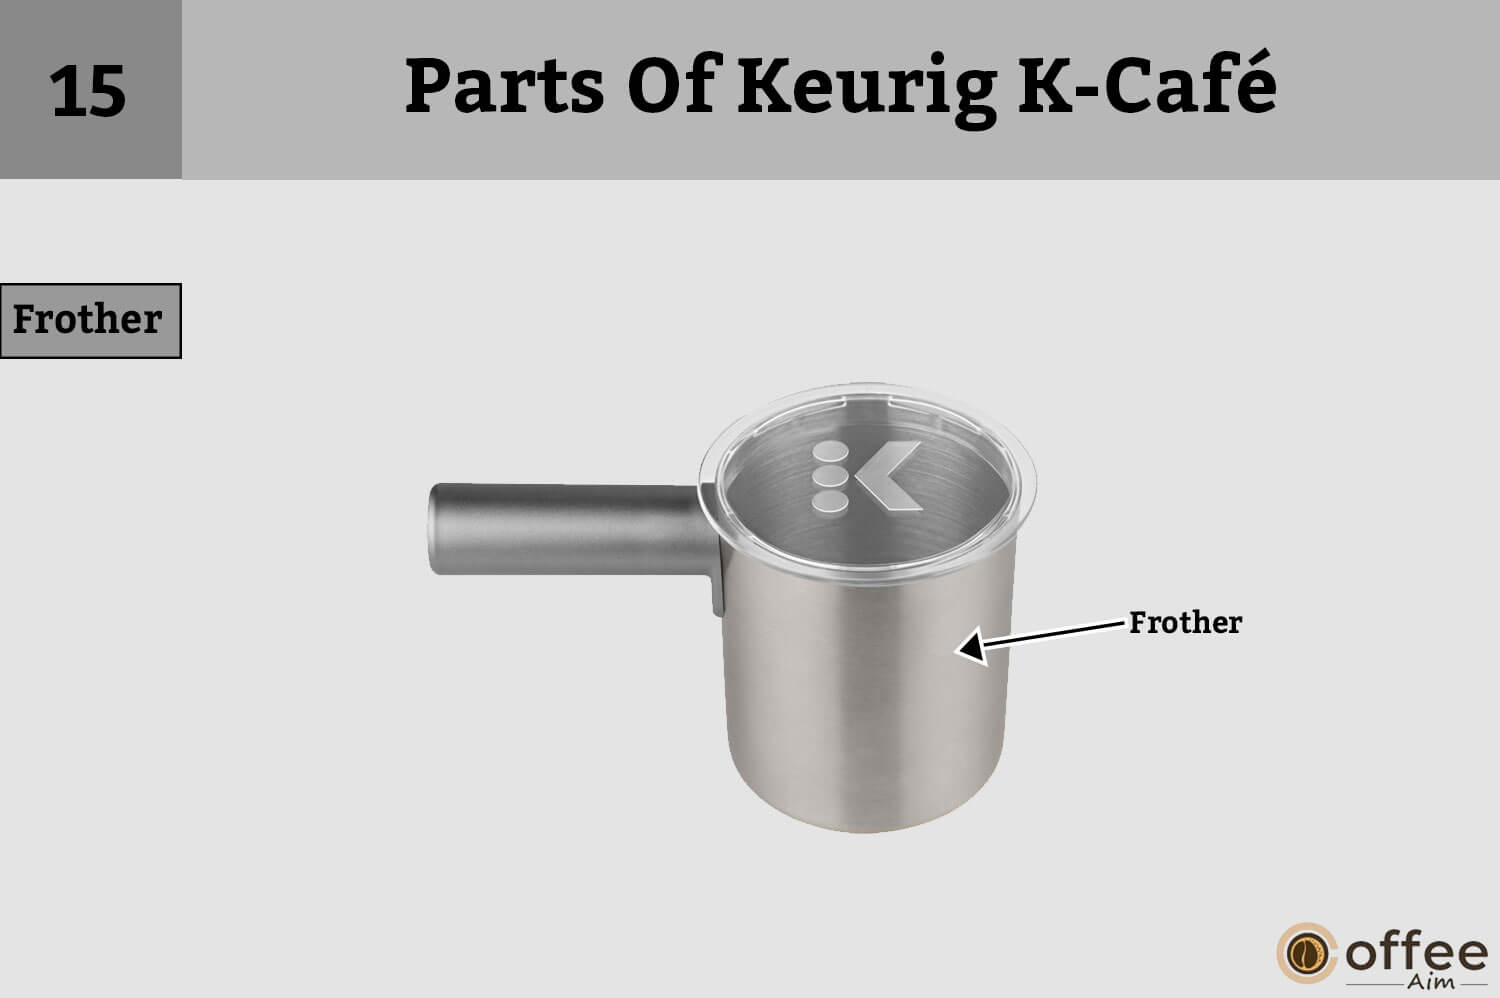
The Keurig K-Cafe machine’s frother is a versatile component that lets you create frothy and creamy drinks such as lattes, cappuccinos, and hot cocoa. It is simple to use and has a control button allowing you to select the froth you want. You can make cafe-quality drinks in the convenience of your residence with the frother.
Cleaning your Keurig K-Cafe keeps it looking like new. After all, nobody wants to drink from a dirty carafe. It’s true that cleaning a Keurig isn’t that difficult, but there are a few things to consider when cleaning a carafe. Let’s see how we properly clean our Keurig K-Cafe!
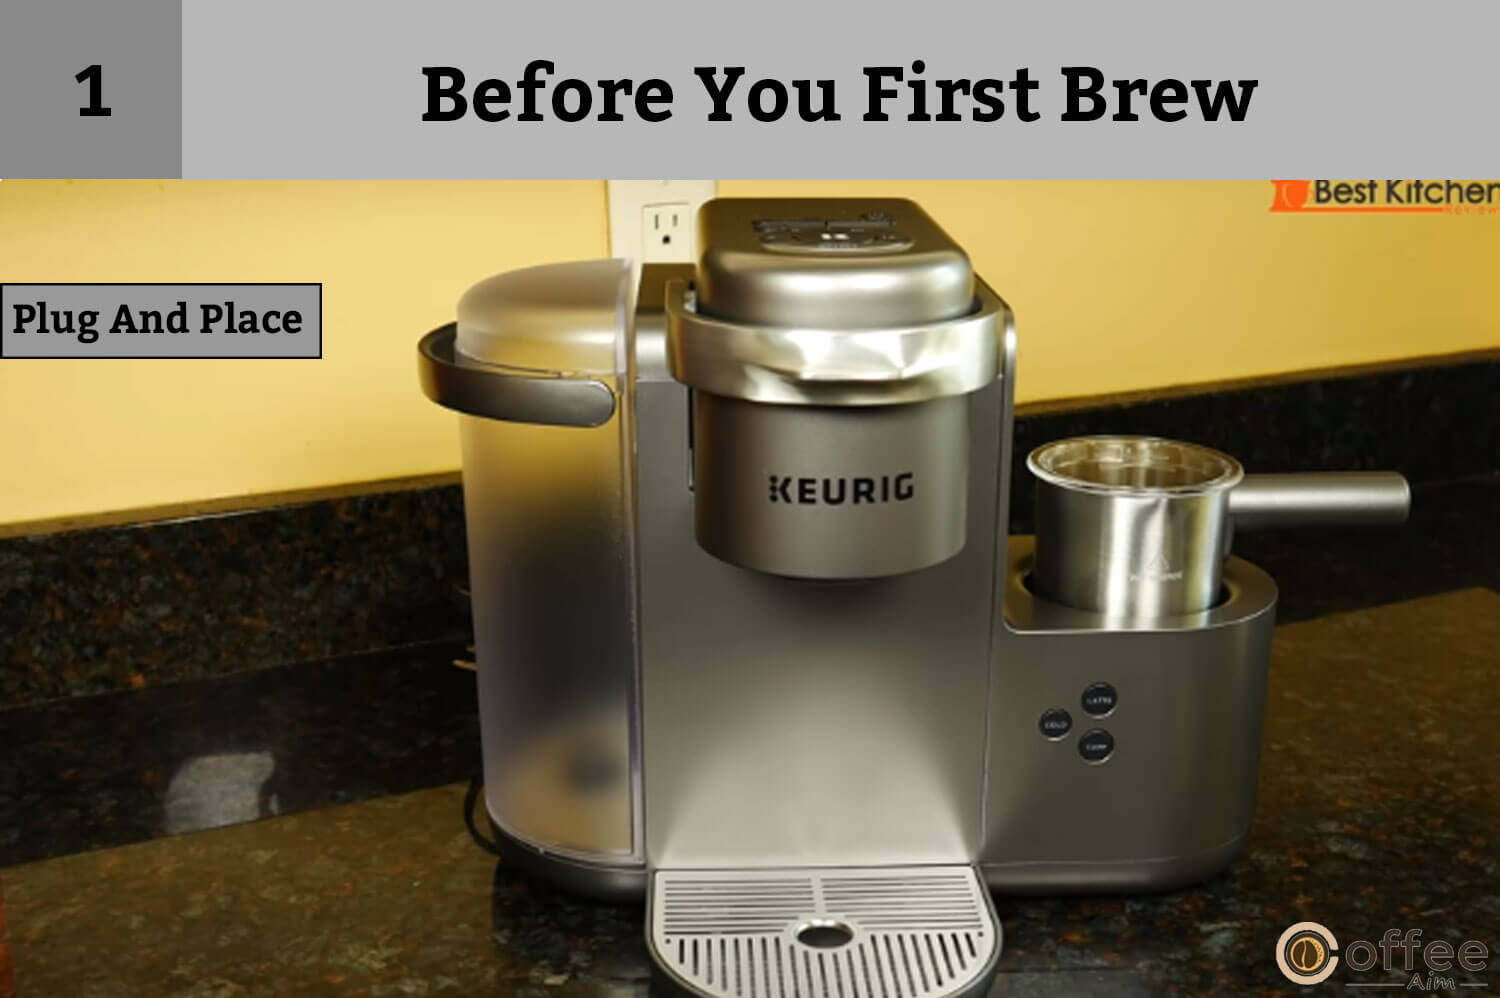
After removing the machine from the packaging, first of all, plug the machine into the socket and place a mug of 12oz minimum on the drip tray.

The Keurig K-Cafe has a water tank that is good enough to make almost 100 cups of coffee, quite a lot compared to the other Keurig models. The part of the water tank that holds the water is made from plastic, and its height is 9″ tall. The lid can be tilted so that you can view what’s inside if you want to. To rinse it, you have to follow the points below:
Note: Avoid using distilled water.
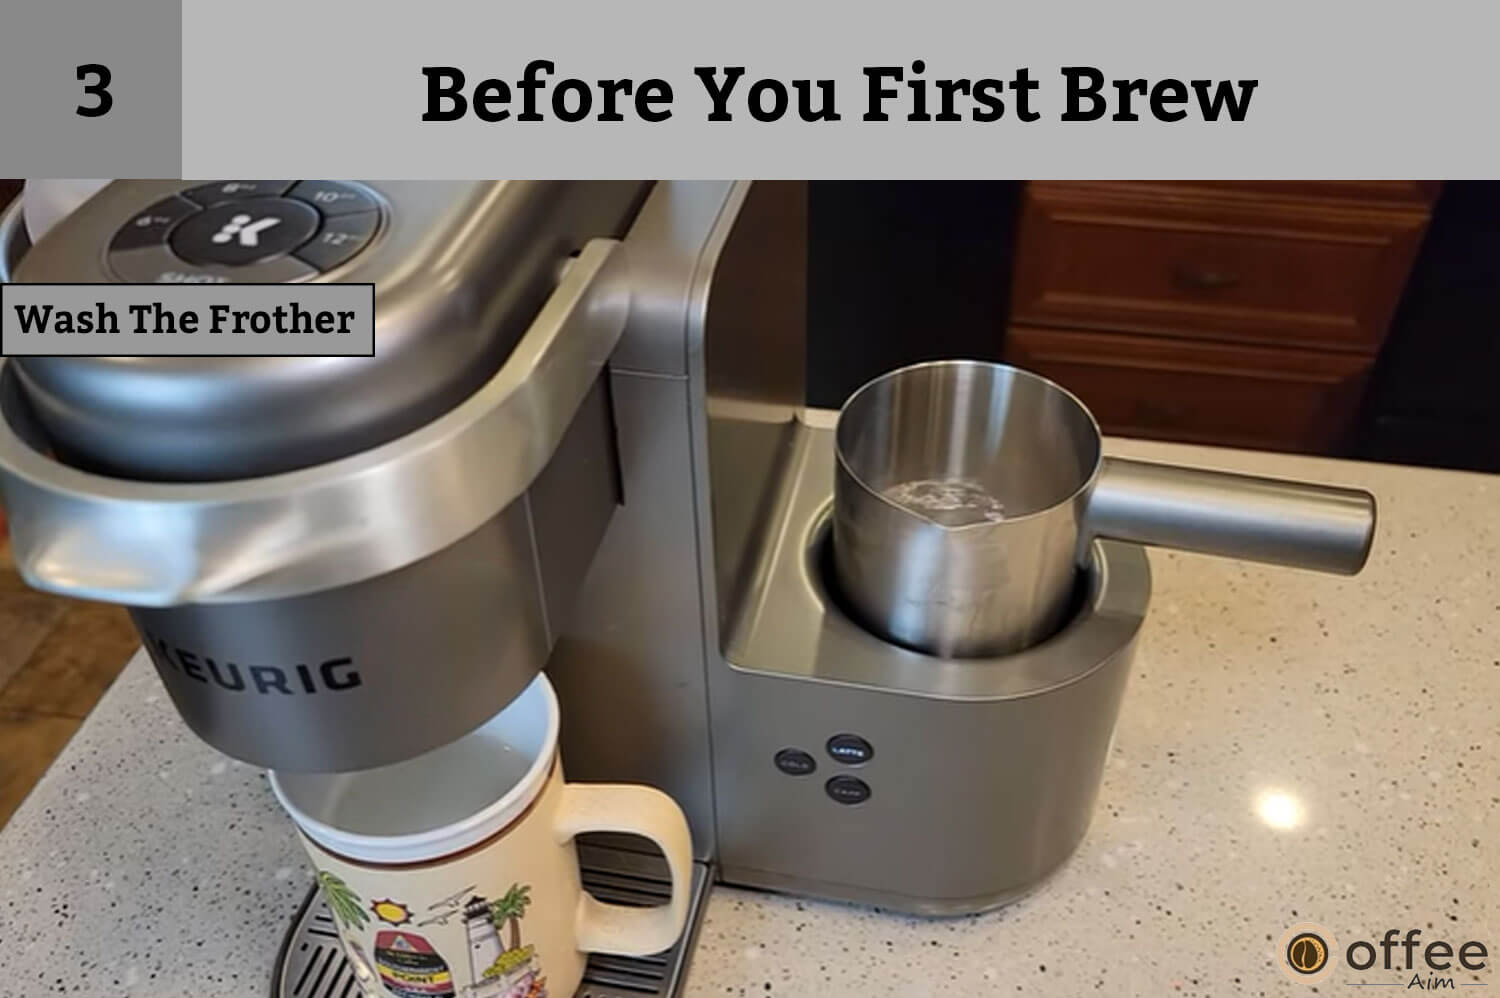
After cleaning the water reservoir, now it’s time to wash the frother thoroughly. You can find the frother on one side of the machine. To wash the frother, follow the steps mentioned here:
Note: It is advisable to use non-abrasive clothes to dry the machine.
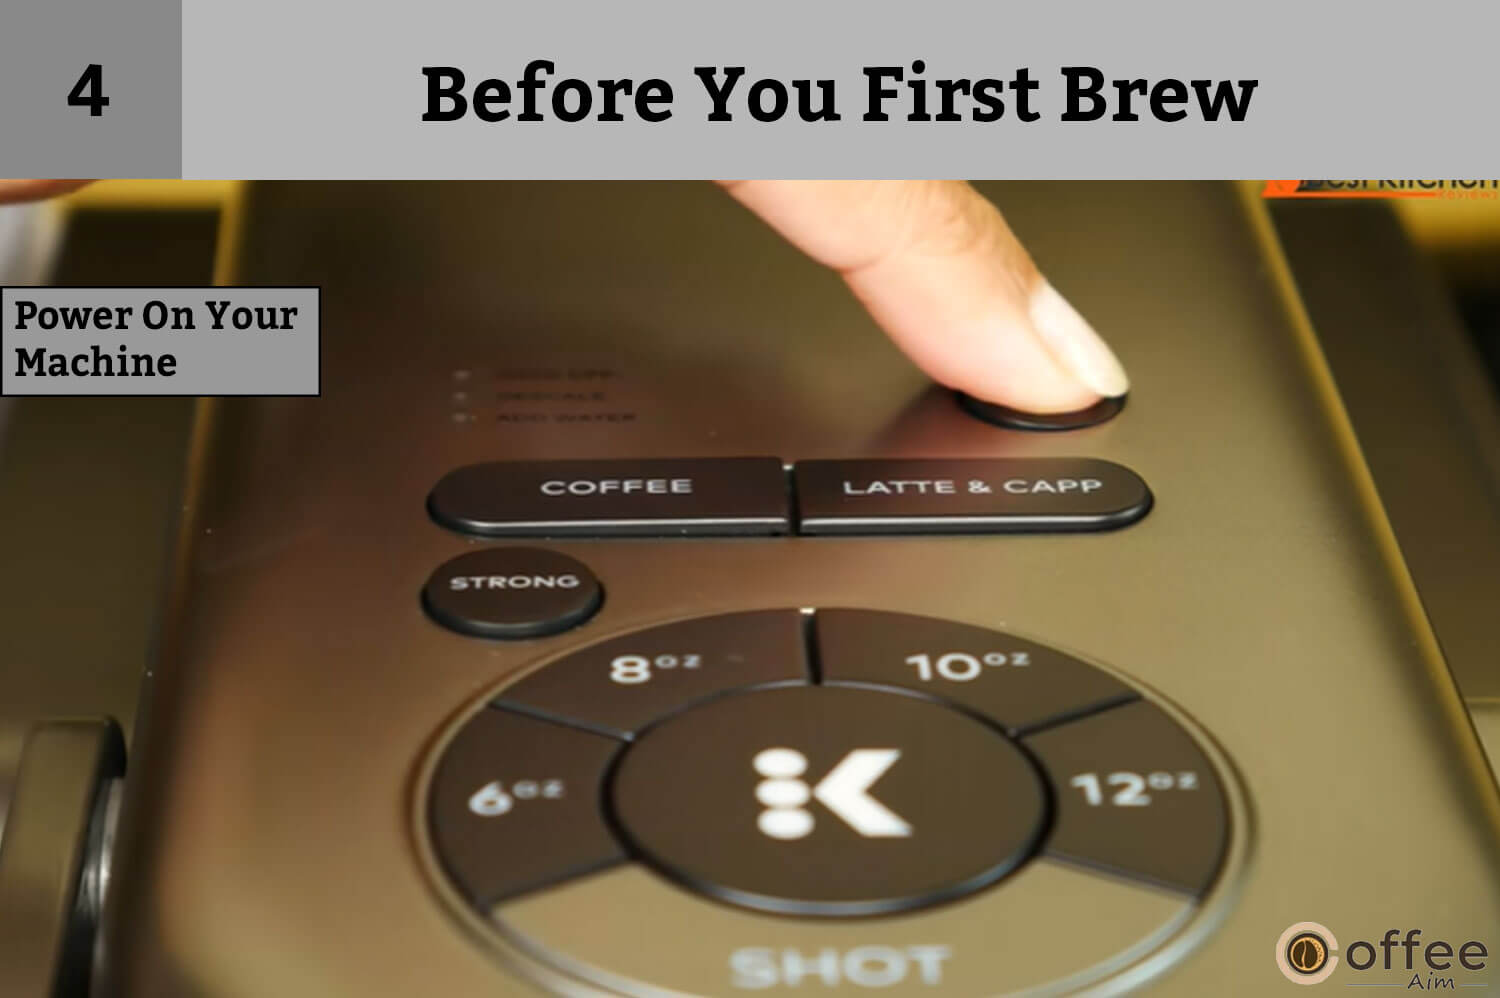
When you connect the machine to the power supply, the light on the side of the machine will illuminate. Once the bulb illuminates, the Brewer will start heating water automatically. After 3 mins, the Brewer is ready to make coffee.
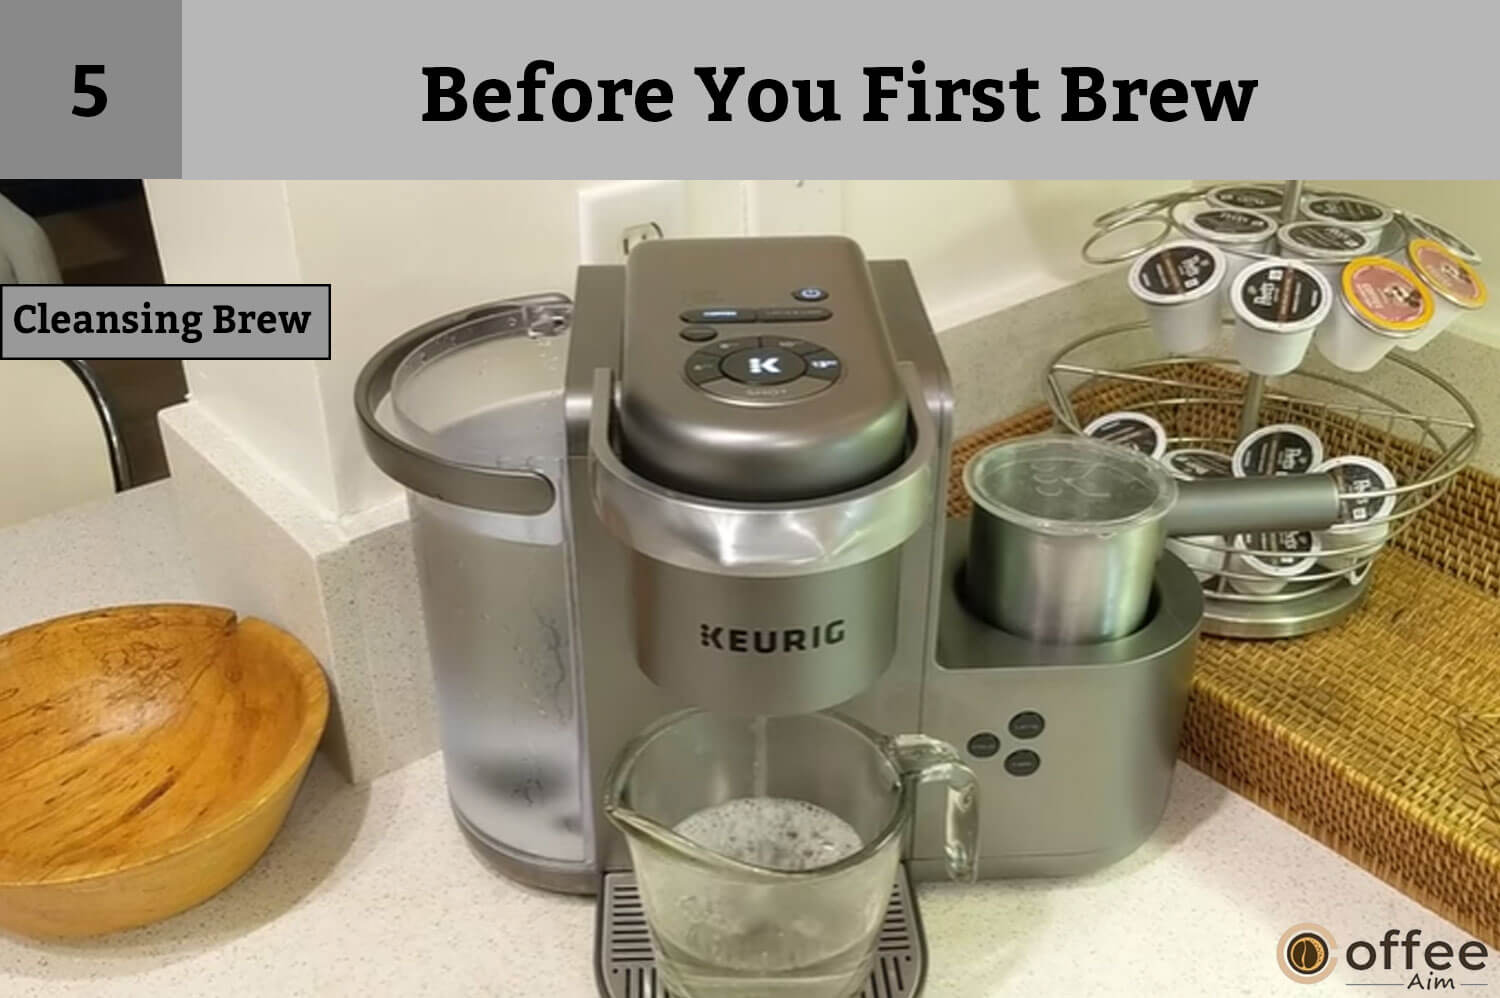
You know the saying, “good things come to those who wait.” When it comes to keeping your Keurig K-Cafe clean for a long time, I can tell you that good things come to those who wait. My friend, the easiest way is not always the best. Improper cleaning may reduce your overall performance and can result in severe issues with your machine. So I will tell you the detailed cleansing process of your brew. Before you start, you must know when you lift and then lower the handle of the brewer. The COFFEE and LATTE & CAPP buttons will start illuminating. Do not insert a K-cup pod at this point.
Note: The brewer may take a minute to reheat between brew cycles.
This is all about cleaning and washing the Keurig K-cafe.
Are you excited to make your first cup of latte or cappuccino? The answer is a big YES. Then, without any further delay, let’s get started.
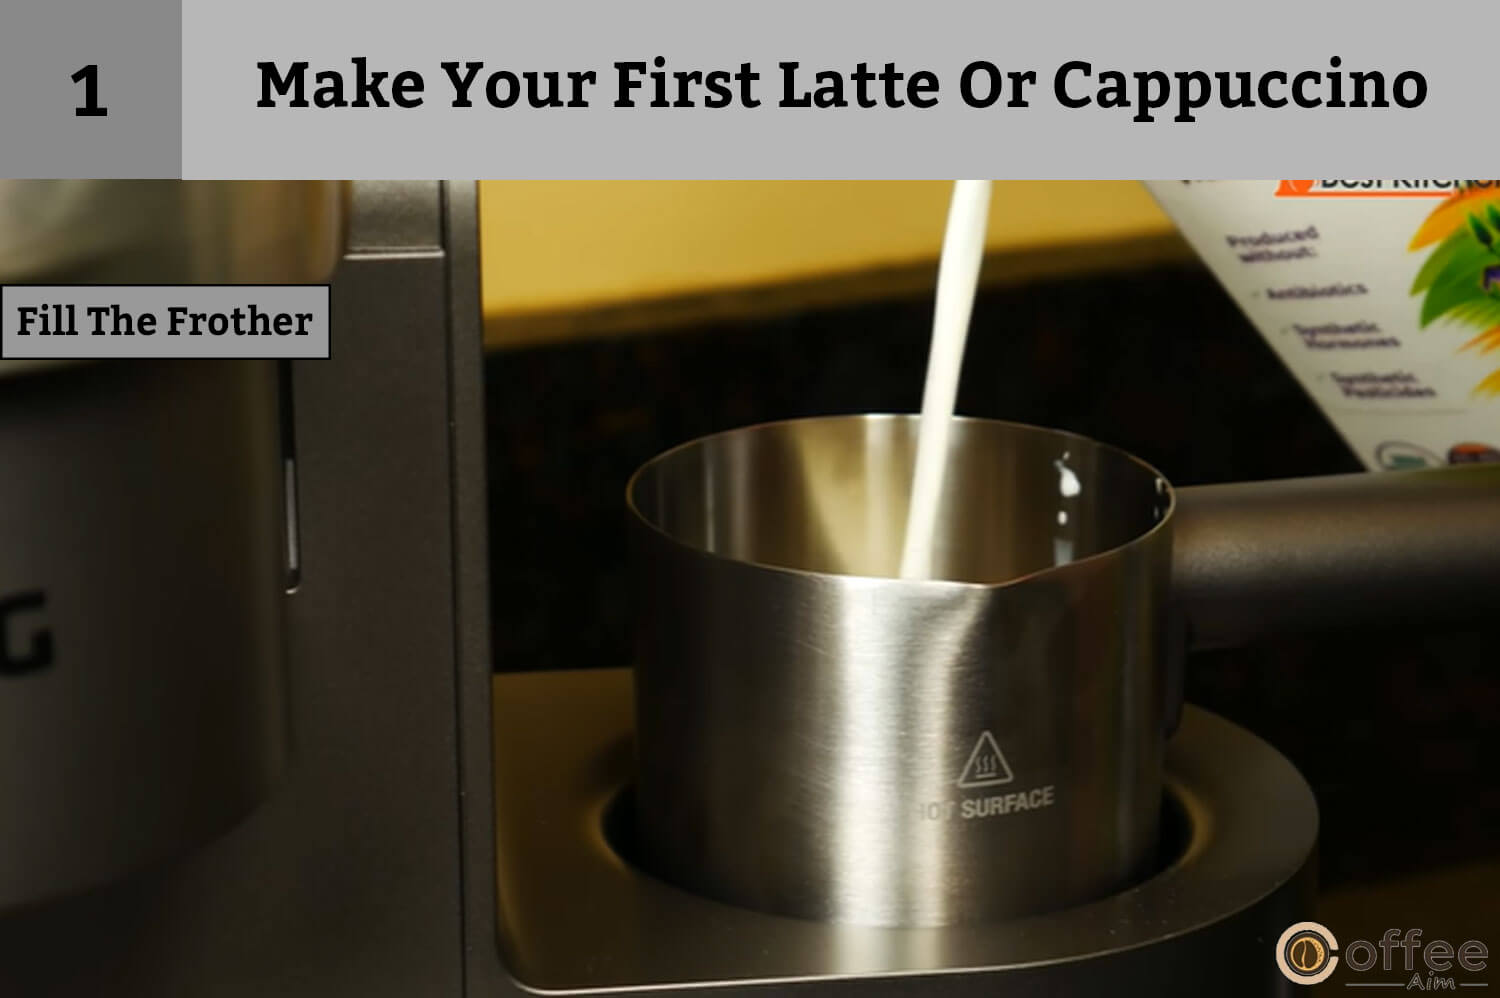
The first step is to fill the frother with milk up to the required level. Operating the frother is different depending on the type of recipe you want to prepare. Here I will discuss two different beverage types and the frother operating processes accordingly. Let’s do it!
Tip: if you are facing any trouble while operating the frother, call the number provided in the “click or contact “section
Note: make sure not to under or overfill the frother. For your convenience, there is a hint that the CAPP line means minimum fill, and the LATT line means maximum fill. And also, remember not to operate it before adding milk
Are you ready to brew a cup of coffee without making any mistakes? You have heard about this fantastic technology and are curious to try it. I have made it easier for you to make delicious iced coffee with your Keurig K-Cafe.
Note: Remember not to overfill or underfill the frother. Remember that the CAPP line means minimum fill, and the LATT line means maximum fill. Make sure to fill the frother with milk before operating the machine.

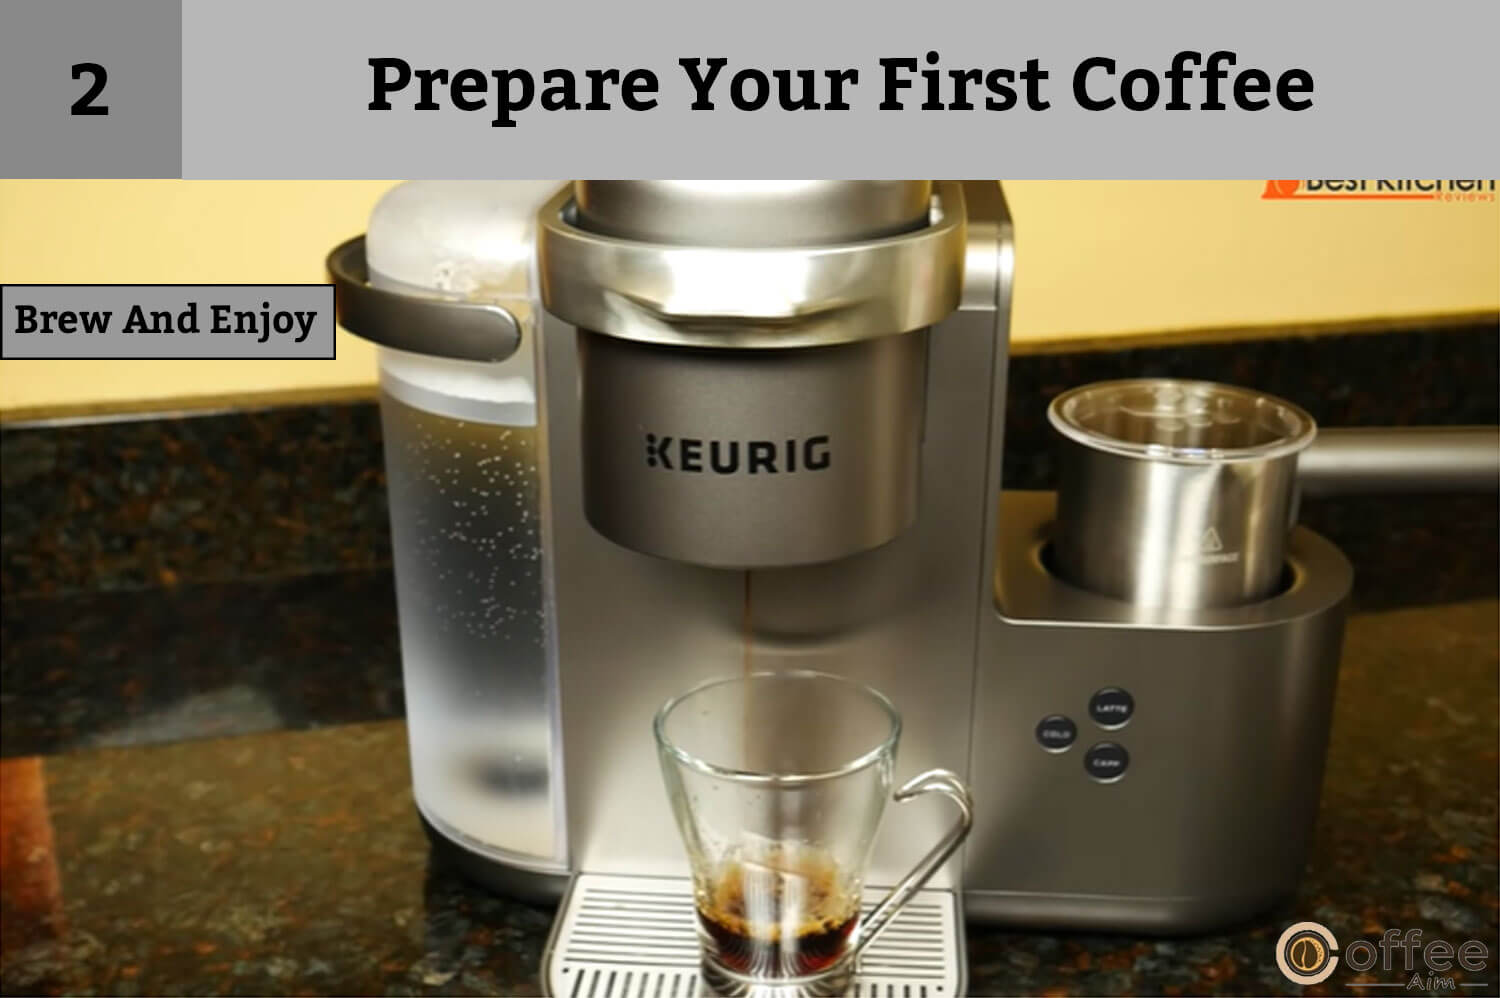
I know you guys need help to learn about all this to enjoy Keurig K-Cafe’s coffee. But the time is over, and now I will tell you to brew your first cup without making any mistakes. These tips will help you learn how to make a perfect cup of coffee brewed with our product without the hassle of complicated steps. Follow the steps below:
Note: Do not remove the foil present in the K-Cup pod.

After placing the cup on the dip tray and putting the K-Cup pod in the K-Cup pod holder, push the button on the machine and let the Keurig K-Cafe start its magic. This Keurig product is for you if you want to be quick and care less about making coffee. The Keurig K-Cafe consumes around 10-15 seconds to prepare your coffee. We have made it easier for you to brew your first coffee. So let’s begin:
Note: To avoid injury, never lift the handle during brewing as it contains boiling water

Now it’s time to pour the frothed milk into the coffee. For this purpose, first, remove the frother from the base and then the lid. Pour the milk from the frother into your coffee. Right now, you can enjoy your self-made coffee.
Note: Immediately after use, clean the frother. Cleaning instructions can be found in this guide titled Caring for Your Brewer.
Beside making the perfect Latte and Cappuccino, you can also make the perfect black or simple coffee with your Keurig K-Cafe. Creating the perfect cup of coffee may seem like an overwhelming task, but with a few simple steps, you will be able to brew your very own K-cafe Brewed Coffee.
Whether it’s summer or winter, coffee craving is a universal fact. But the correct use of a brewer makes the yummiest coffee. So let us brew your first coffee!
Brewing coffee is a really easy task when you have the companionship of Keurig K-Cafe and I have made it even easier for you. In order to brew safely, follow the guidelines below:
Note: Do not remove the foil from the K-Cup pod.
Once you place the cup on the pod, you will see COFFEE, and the LATTE & CAPP button will start blinking. When you press the COFFEE button, the 4-cup size will illuminate. Select your desired size. Press the STRONG button before selecting your cup size. After selecting the type, now press the brew button. During brewing, the COFFEE button, cup size, and STRONG button (if selected) will remain illuminated_almost one minute. When they stop blinking, it means the brewing is completed. Now lift the handle and dispose of the used K-Cup pod. You can brew again after 1 min.
Note: The brew buttons will be turned off after 60 seconds. Lift and lower the handle completely to reactivate.
K-Cafe is made to give you the best experience you can imagine. However, even with modern technology, things tend to get dirty sooner or later. If you have K-Cafe then there are certain things that you must know about it so as to maintain hygiene, hygiene, and cleanliness all the time so that it remains clean, maintainable, and sanitary always.

Cleaning frother is tricky and essential, too, as it directly interacts with milk and coffee grind. I made it clear and easy for you. Just follow the steps below:
Note: Always use non-abrasive clothes
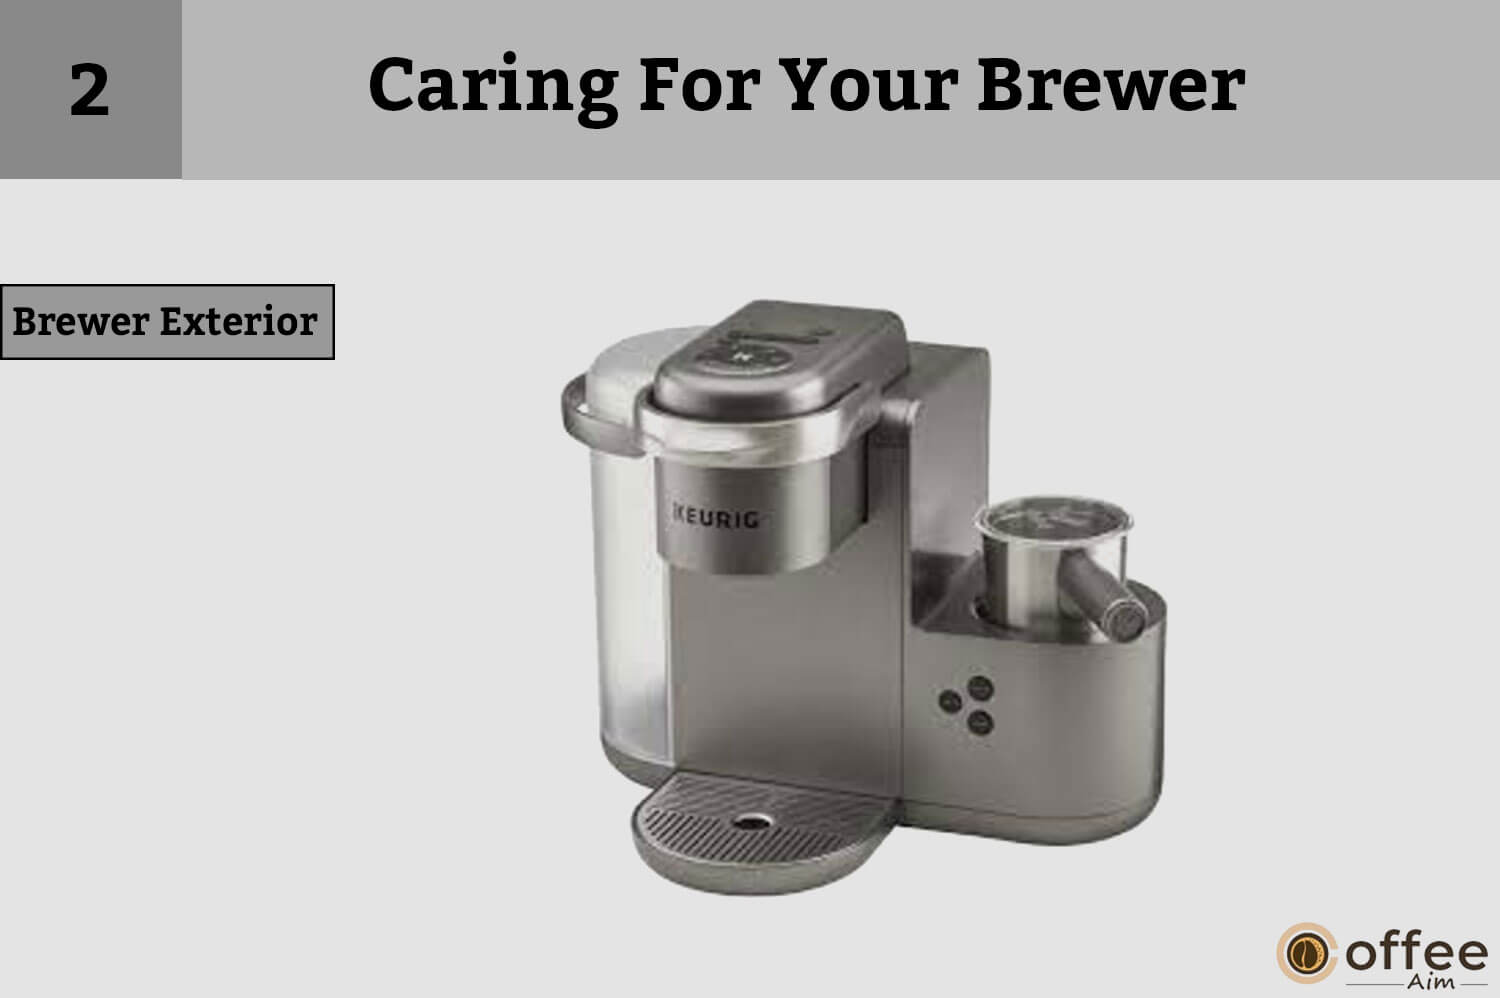
Cleaning a brewer is tricky and confusing. We have made it very clear to you. Read the following points carefully to clean the brewer exterior completely
Note: Do not leave the brewer immersed in water or liquid.

You can see the K-Cup holder at the top of the machine. It is a small part of the machine and needs to be cleaned promptly and carefully. We have summed up the instructions below:
Note: After brewing, always discard or remove the used K-Cup® pod.
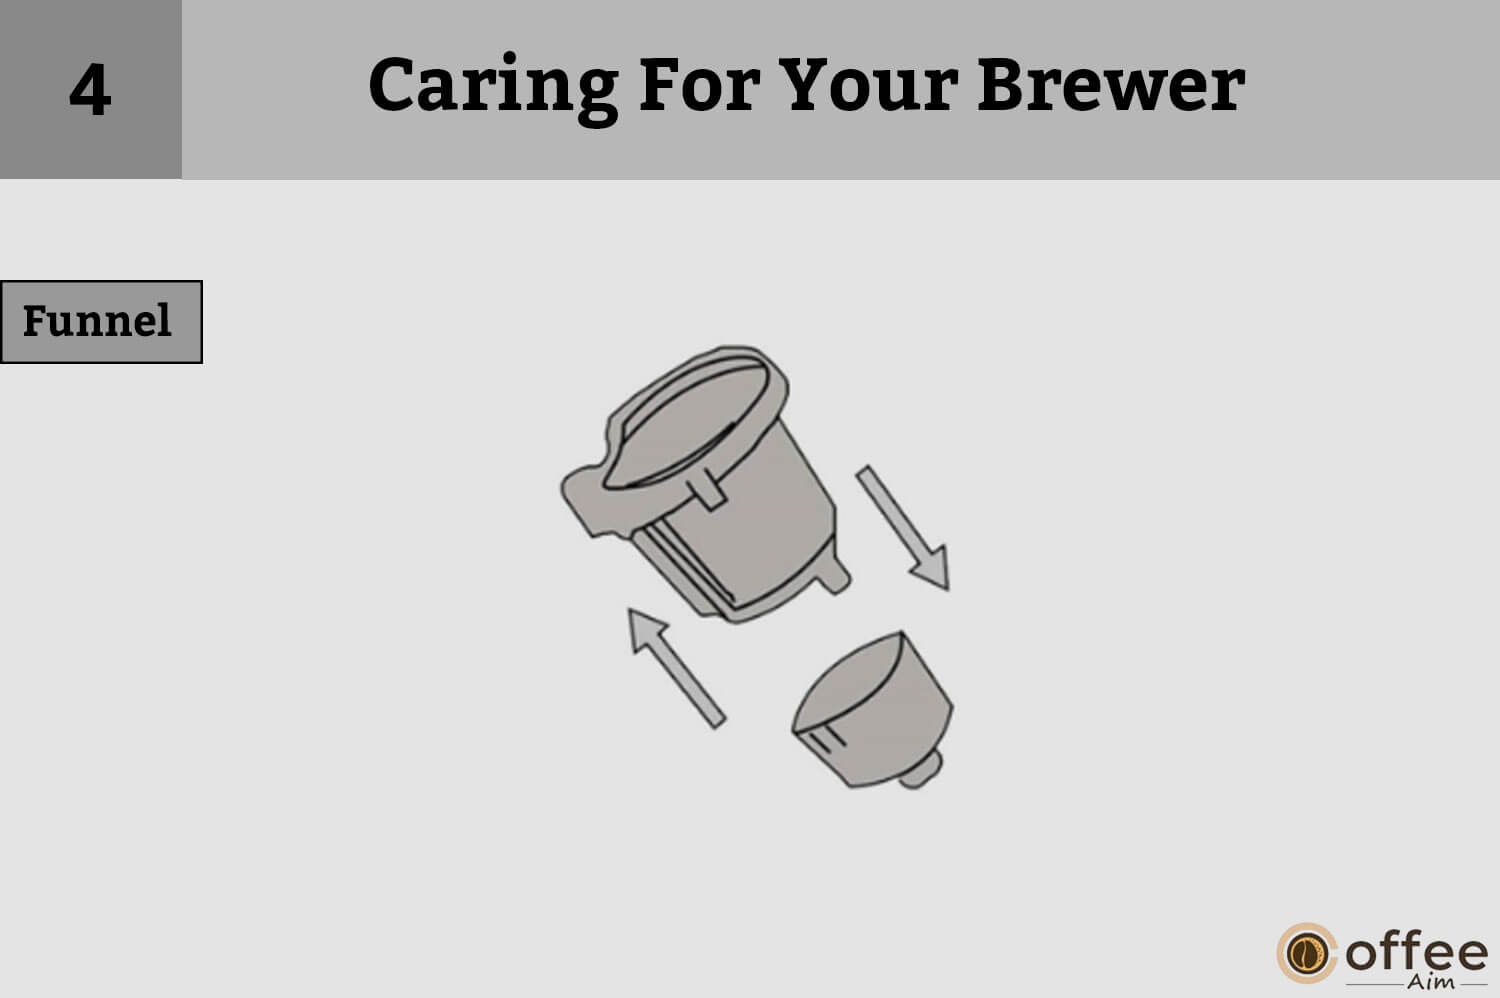
To experience fresh beverages, the funnel should be cleaned properly. You can separate the funnel from the K-Cup pod holder by pulling it off. It eventually popped out. Replace it by orienting the snap to the indent and snap it back onto the K-Cup pod holder.

Like all other parts, the water reservoir and lid should be cleaned properly and periodically. If you use the dishwasher, place it on the top rack. If using hand wash, use a non-abrasive, lint-free, and soapy cloth. After that, rinse it thoroughly to wash off all the solution. Now, fill the water reservoir and return it to the brewer.
Note: Do not clean the inside of the water reservoir with a cloth, as its lint may remain in the pool. Remove the water filter if you are using any in the water reservoir.
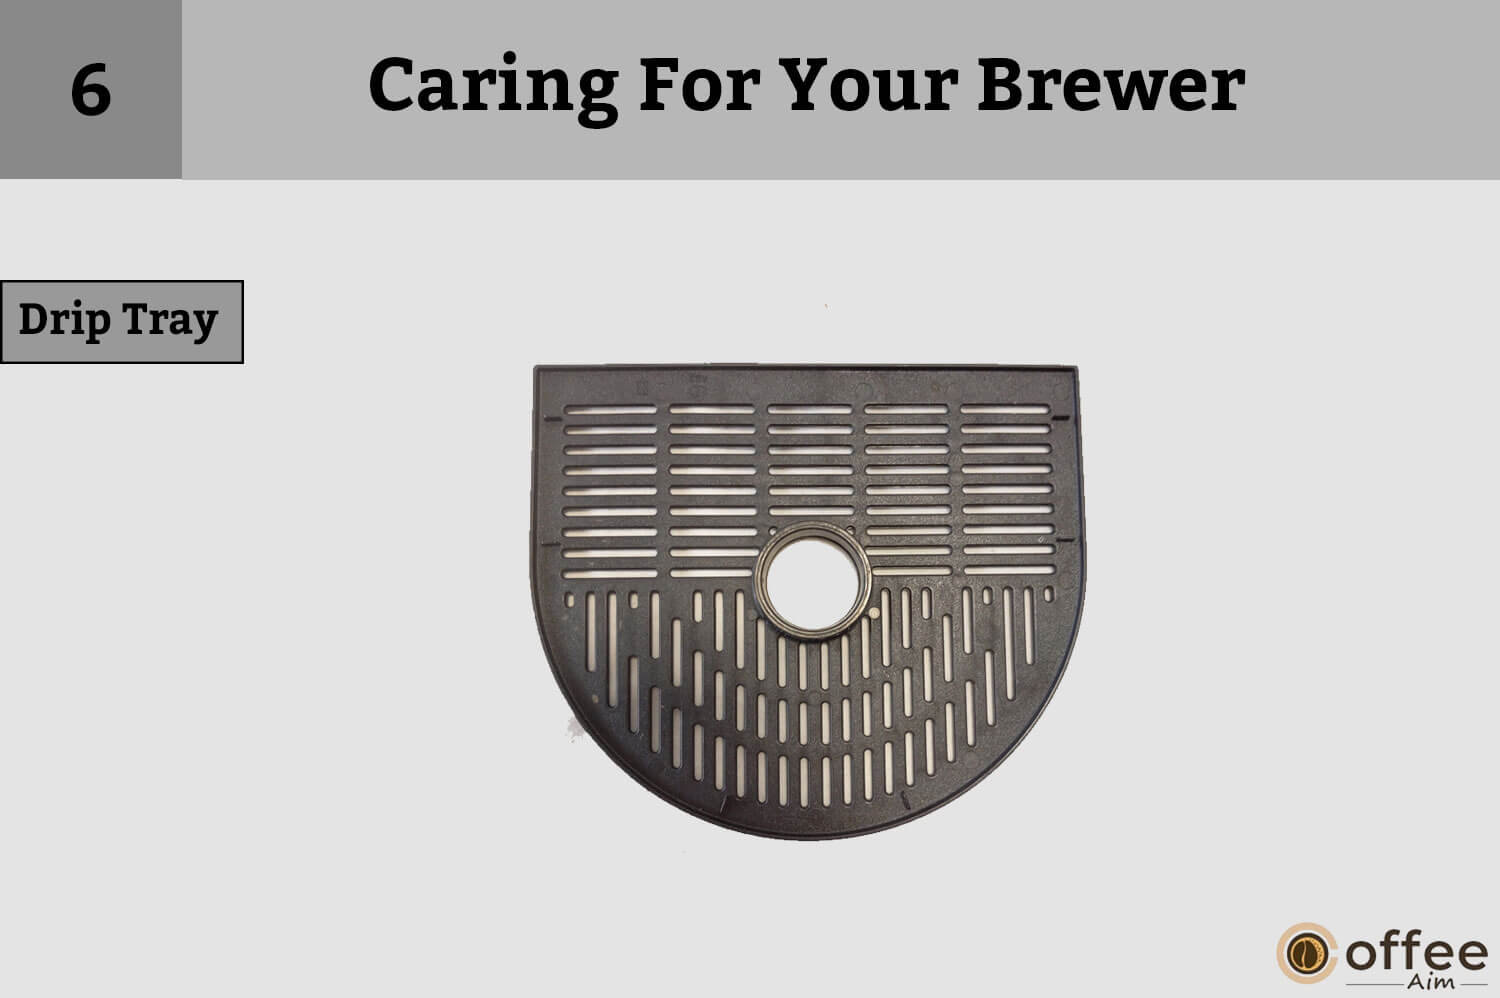
A drip tray is capable of holding 8 ounces of overflow. So it should be cleaned and emptied on time. For this purpose:
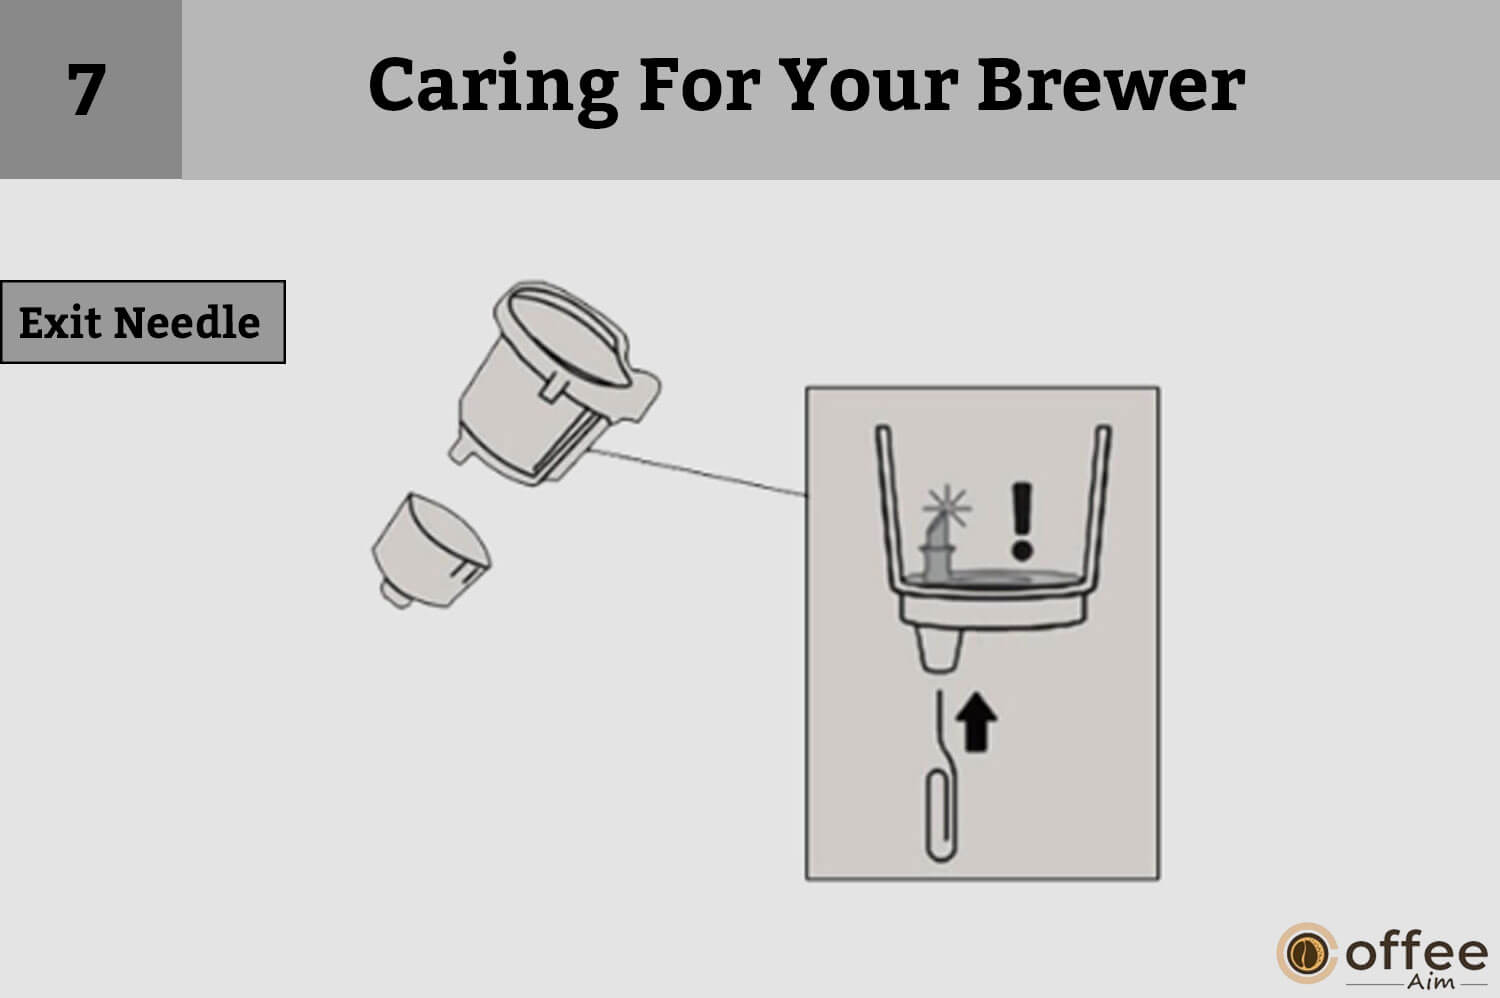
There are two types of needles in the Keurig K-Cafe. One is an exit needle, and the other is an entrance needle. You must be cautious about cleaning the needle as it can cause injury. So read the following points carefully for safety concerns.
When you lift the brewer, you will see a needle that is the entrance needle. Clean both holes in the needle with a straightened paper clip. Carefully move the paper clip to remove any debris or coffee ground. Then lower the handle and run a 2-water-only cycle for cleaning purposes. During this, do not insert the K-Cup pod.
Note: For video instructions on washing the entrance/exit needles, go to support.keurig.com.
After every three months, your Keurig K-Cafe needs to be descaled to keep it in good condition. The scale is a mineral deposit that builds up in the brewer, so removing this buildup is essential by cleaning the water out of the appliance right after each use. If you haven’t done this yet, then it’s time to clean your Keurig K-Cafe.
An ideal time to do descaling is every 3 to 6 months. You should carefully wash and descale all the brewer components once in 3 months according to advice.
For Descaling You Need:

The first step in the descaling process is cleaning with the help of the descaling solution. If you do not have the Keurig K-Cafe descaling solution, you can order it. To descale it properly, follow the steps below:

After cleansing, rinse the water reservoir; it’s time for the internal tank to soak. For internal tank soak:
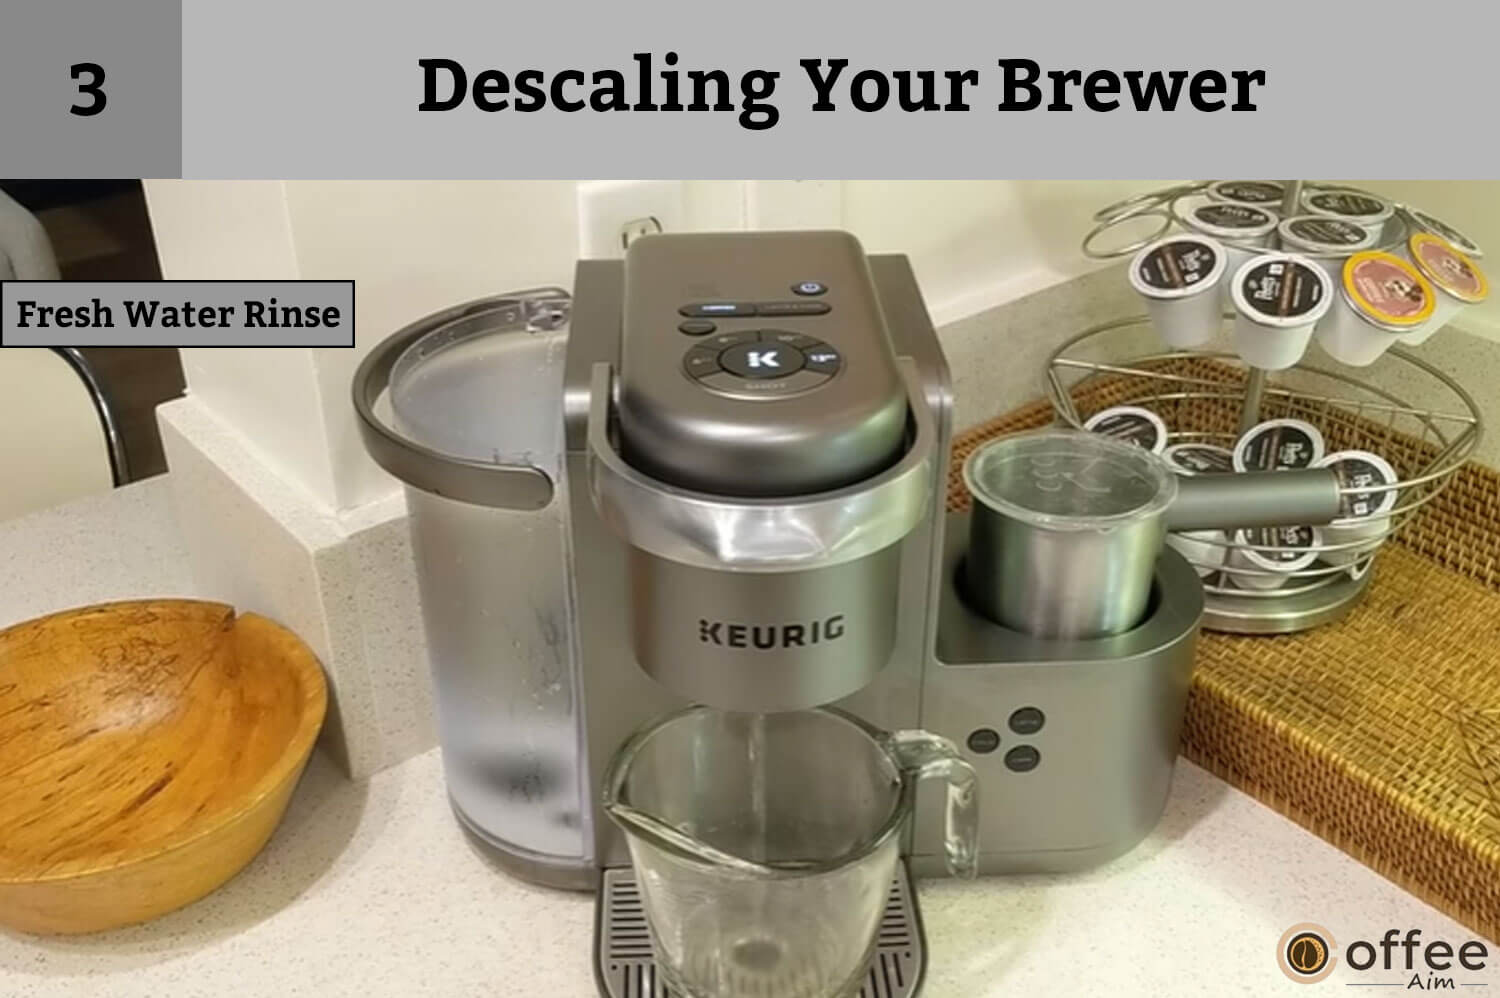
After cleansing and rinsing, wash the brewer with fresh water. Read all the points below to learn how to flush the brewer with fresh water.
Note: Keurig® Descaling Solution’s cleaning action may result in “foam” discharged from the brewer. This is usually because the solution is reacting with the scale within. After adding the descaler to a heavily scaled brewer, the brewer may not fill appropriately. If this happens, you may notice that only a small amount of output is dispensed, followed by the sound of air blowing out. If this happens:
I know there are some specific problems that people are facing, and they want to solve their problems as quickly as possible. Therefore I am making a separate heading for this so that those with such issues can find the solution with a click.
If you are finding grounds in your coffee, it may be due to the accumulation of some substances in needles. You can clean the entrance and exit needles with straight paper clips and follow the instructions in the “caring for your brewer section.”
When placing the K cup pod on the holder, close the cap firmly, and the handle is fully lowered.
Fill the water reservoir up to the limit. If the “add water light” is illuminated continuously, even after filling the water reservoir up to the limit, then call Customer Service.
Always remember that you can use the frother and brewer at different times. You have to wait 30 sec when milk is froth, and then you can brew the coffee. If the frother light is still on, call customer service.
Are your Keurig K-Cae coffee makers starting to brew partial cups? If yes, then this article will help you resolve the problem. However, you need to follow all the rules below until a solution can be found.
It may be for the following three reasons.
Does your Keurig K-Cafe turn off after a while? Or no electricity? If you encounter such contradictions, please follow the instructions below.
I’ve been a coffee connoisseur ever since I became addicted to the taste of coffee. Yes, I’m referring to your first cup of freedom and success at some point. If it were not for you (yes, you), people wouldn’t know what a great taste of coffee is or how boring it can be without it. But now, back to the point of this post about water: Do not use distilled water for your coffee because it lowers the quality of the drink. Bottled or filtered water will do much better in making delicious coffee than distilled water.
The user can perform the suggested cleaning and maintenance procedures, but no additional repairs or maintenance should be attempted. Instead, if the brewer requires service, the user should consult the guide’s Warranty section to learn how to get it repaired.
Besides all other qualities, the Keurig k cafe machine is also portable. You can take it with you everywhere you go. Following are some essential points you must keep in your mind while storing the machine
Team Keurig promised to keep in touch with their trustful customer. They provide 24/7 online services to help the community safely and effectively use their appliances. You can ask any query at support.keurig.com. You can also call 1-866-901-BREW (2739).
Keurig Green Mountain, Inc. (Keurig) warrants that Keurig K-Cafe will remain free of defects under regular use for a year. This time limit of the year will start from the day of purchase. I recommend you register your brewer on keurig.com/new so the system can have a record of yours.
This warranty is only valid in the United States and Canada. If you choose to use other Keurig K-Cafe infusion products, be careful, as Keurig will not be held responsible if Keurig K-Cafe is damaged. A service fee will be charged if certain non-Keurig® pods and accessories cause damage. The one-year warranty does not cover such damage. Therefore, it is better to use Keurig products for Keurig K-Cafe to function correctly and prevent malfunctions.
This warranty does not cover any damages incurred from using the product, including property destruction or any extra expenses incurred due to any breach of this guarantee, even if such damages were anticipated. Because some states or provinces do not allow the exclusion or limitation of incidental or consequential damages, this limitation or exclusion may not apply to the user depending on the state or province where the product was purchased. Furthermore, this warranty does not cover any damages caused by the use of non-Keurig® pods or accessories, services performed by anyone other than Keurig or its authorized service providers, the use of non-Keurig® parts, or environmental events such as misuse, abuse, an insufficient power supply, or natural disasters.
The above is the sole warranty provided and supersedes any other express warranties, oral or written, regarding the Keurig® brewer. Besides, Keurig disclaims all other warranties related to the Keurig® brewer, including any implied warranties of merchantability or fitness for a particular purpose. Because some states or provinces do not allow the disclaimer of such implied terms or limitations on the duration of an implied warranty, this restriction may not apply to the user depending on the nation or province where the item was purchased.
If you are considering sending your Keurig K-Cafe brewer for warranty services and want to know the return address, please call Customer Service on the toll-free number 1.866.901.BREW (2739). Before returning your brewer, don’t hesitate to contact them and get an RMA number because a coffee maker without an RMA number will be replaced without servicing.
I am delighted that you have visited this article. Now, you can make your favorite coffee cup like a pro, as I have discussed all the information in detail. However, if you are still confused, I suggest you re-reading the article. I always appreciate your presence and affection toward my informative articles. If you want to know more about the coffee maker and coffee-related things, you must visit my website, “Coffeeaim” Stay connected for more informative writing pieces. Till then, best of luck!
This warranty does not include any incidental damages, costs, or expenses resulting from any breach of this warranty ( even if foreseeable). The contents of this warranty in no way expand, alter, replace, or amend any other warranties explicitly stated on any Keurig-related products, including Keurig K-Cafe.
You can consult the Keurig K-Cafe or any other online store from where you bought the machine for any query or confusion. The official website for Keurig K-Cafe is only responsible if you have purchased the device from them. Otherwise, you must seek help from the source where you bought the item.
Most Keurig customers say their machines typically last three to five years. It mainly depends on maintenance. If you properly maintain (clean/descale) your coffee maker, its life span will increase.
It is better but optional. Therefore, you can clean at the end of a busy day or after a week. It is recommended to follow these five steps to keep your Keurig sanitized:
For its part, Keurig Green Mountain accepts
Prepare a coffee pod in single-serve mode. Mix in the desired amount of sweetener. Pour the desired amount of frothed milk into the coffee, leaving a teaspoon of froth on top.
Copyright © 2024 CoffeeAim.com